RSS

Author Archives: gdukebicycles

Unknown's avatar

About gdukebicycles

I make classic bicycle frames using traditional brazing and bicycle alloys.

Marks Pre- 1900 Humber

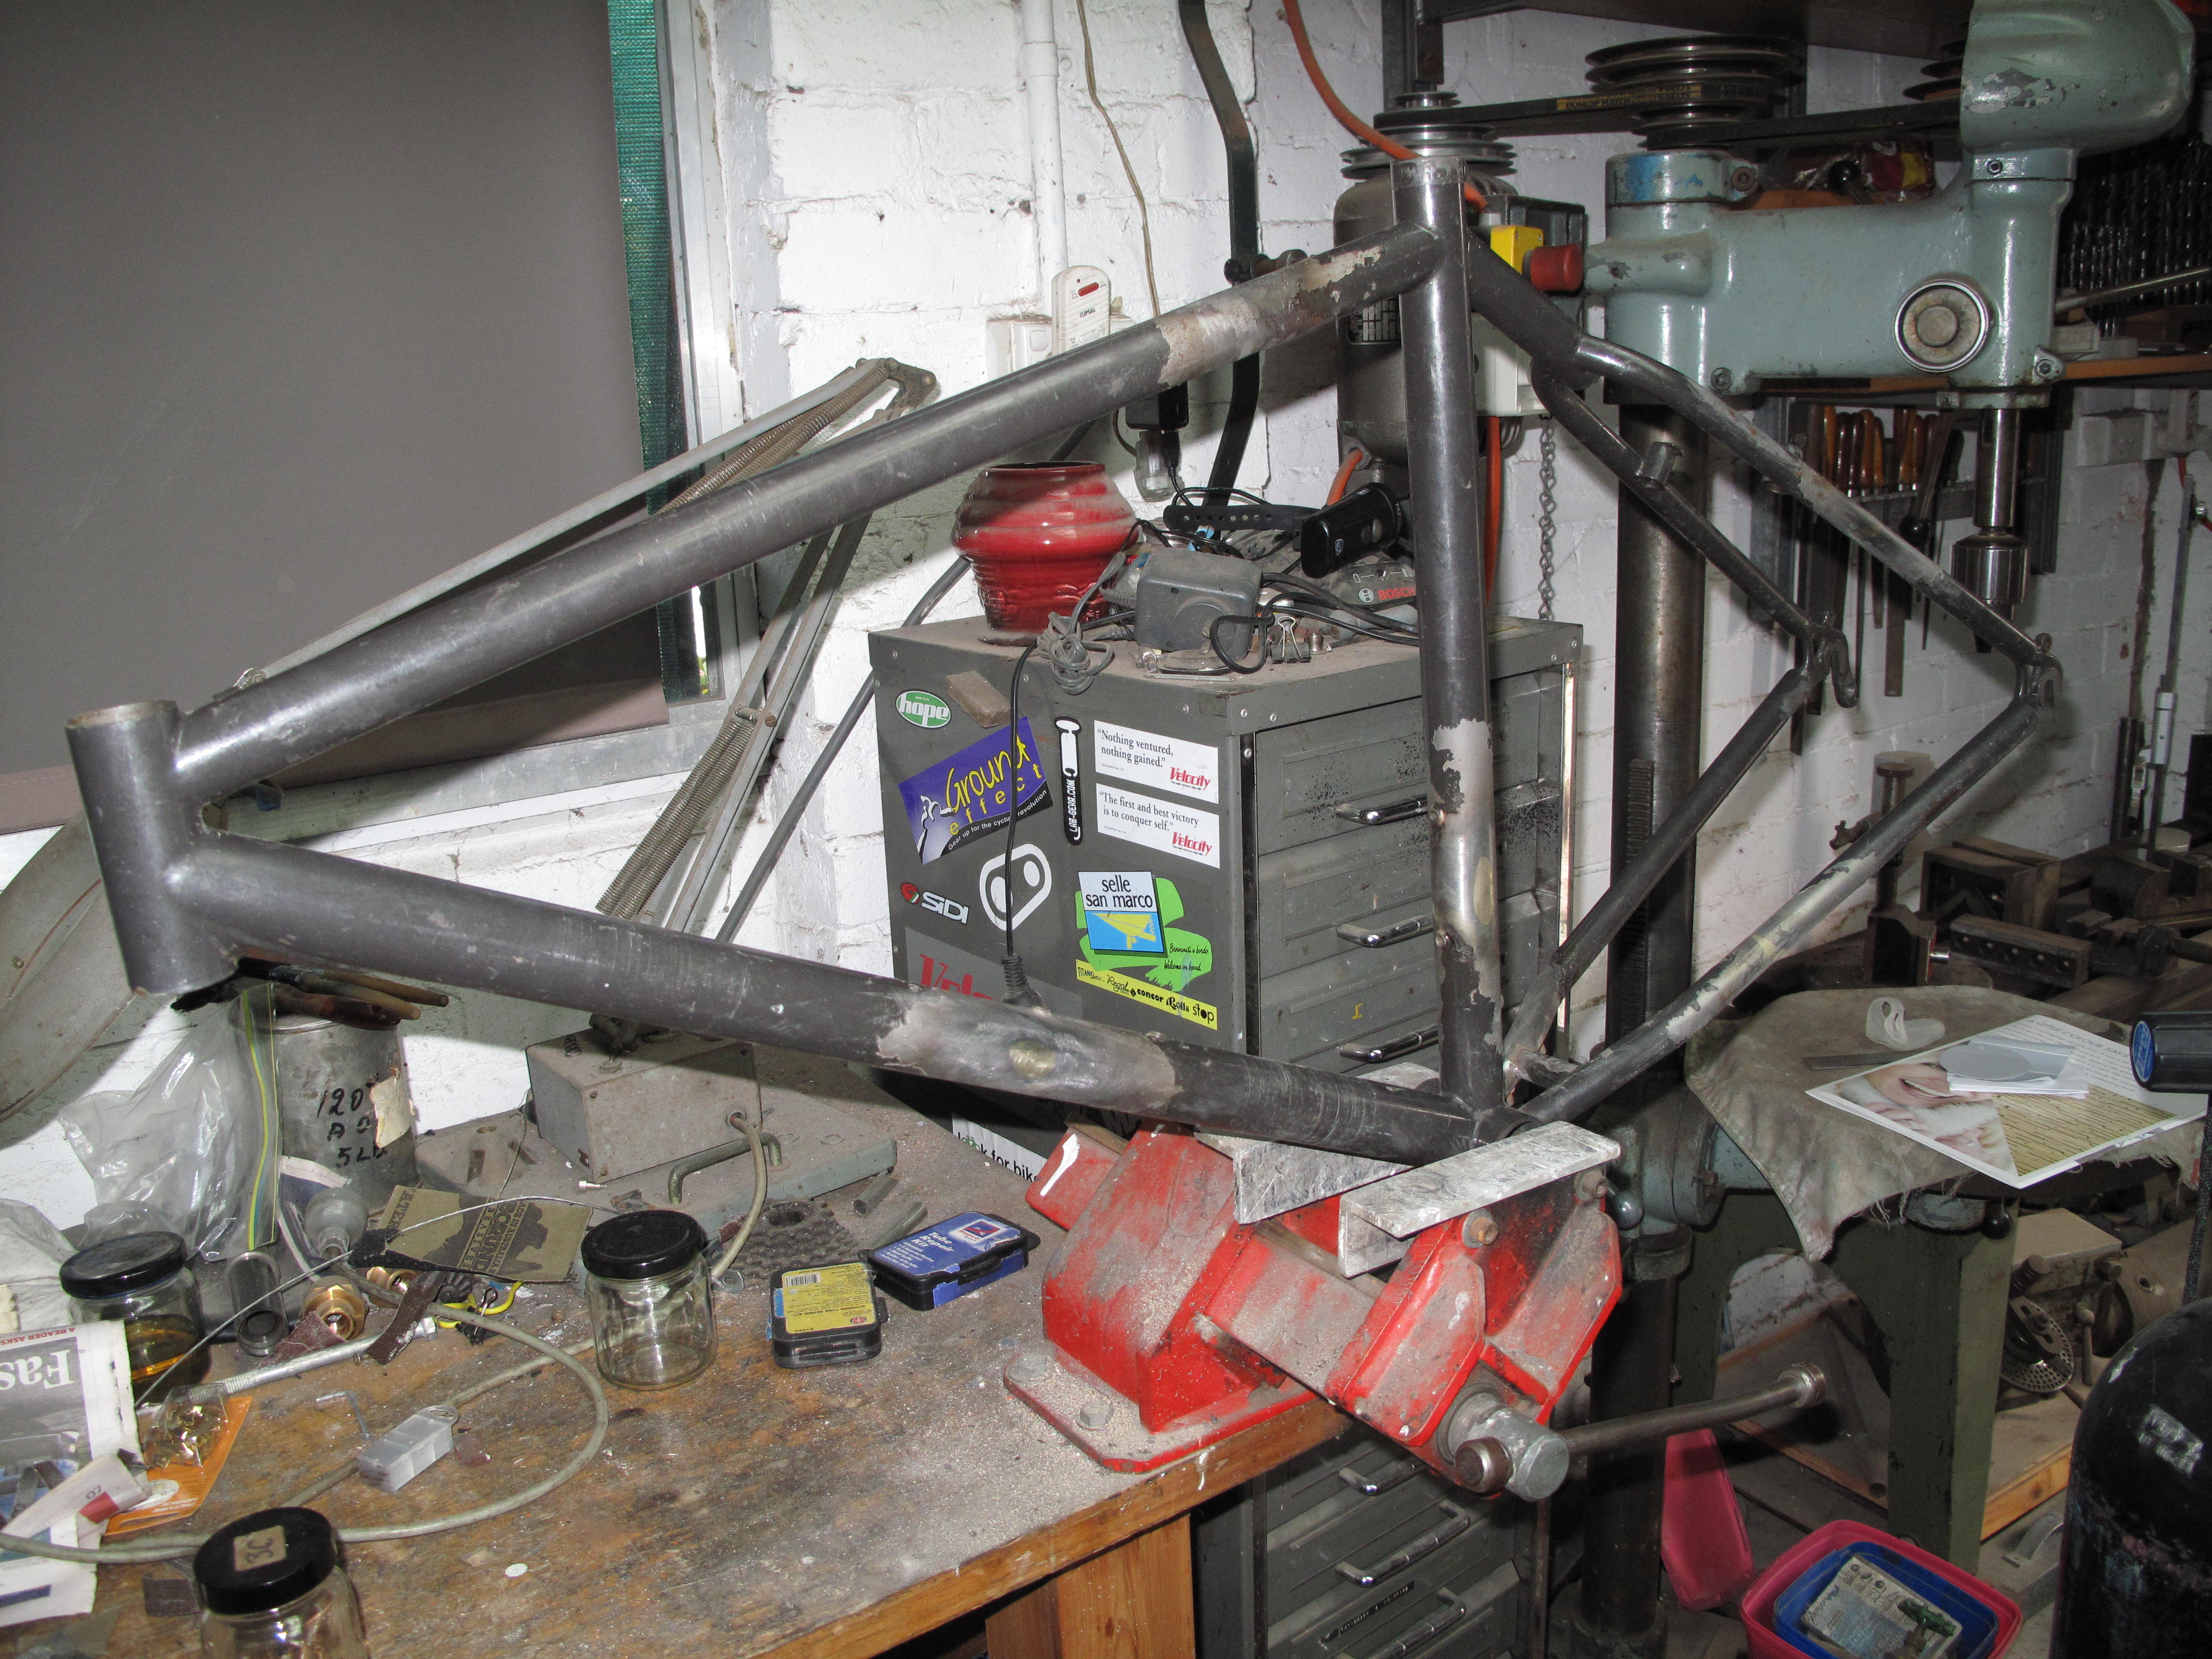
Mark brought me his 1890’s era Humber frame.

Pre- 1900 Humber

Pre- 1900 Humber

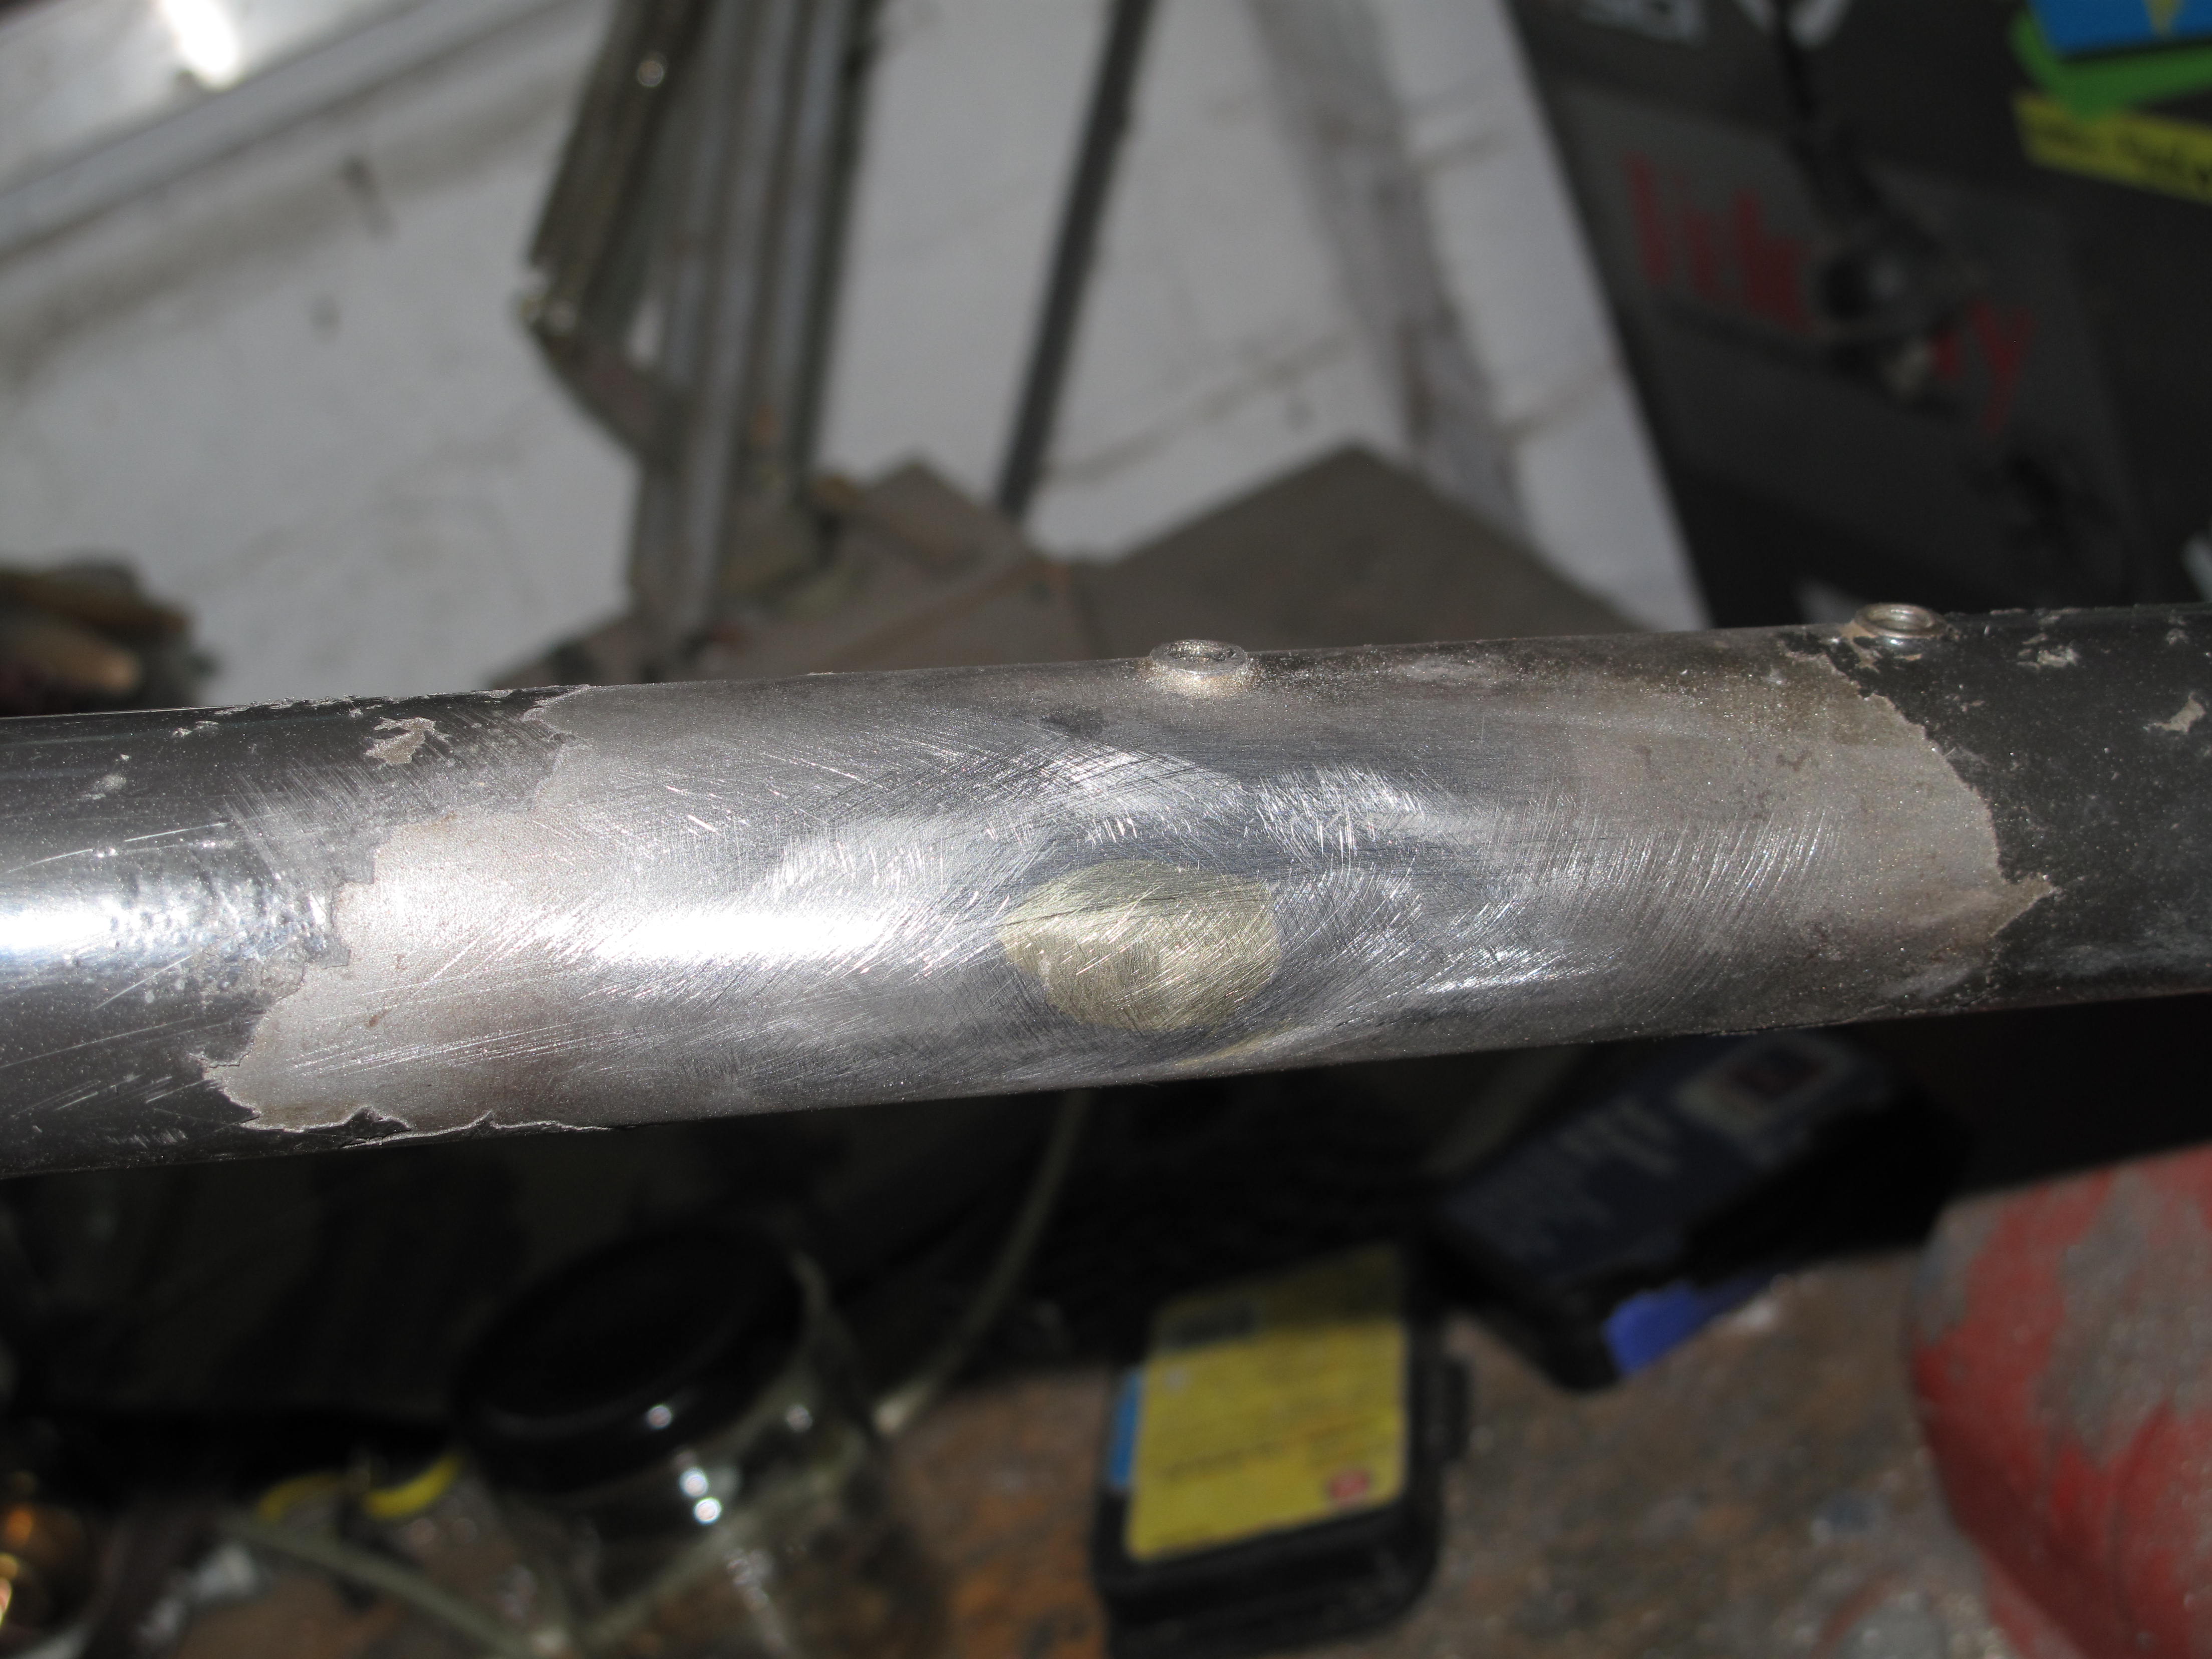
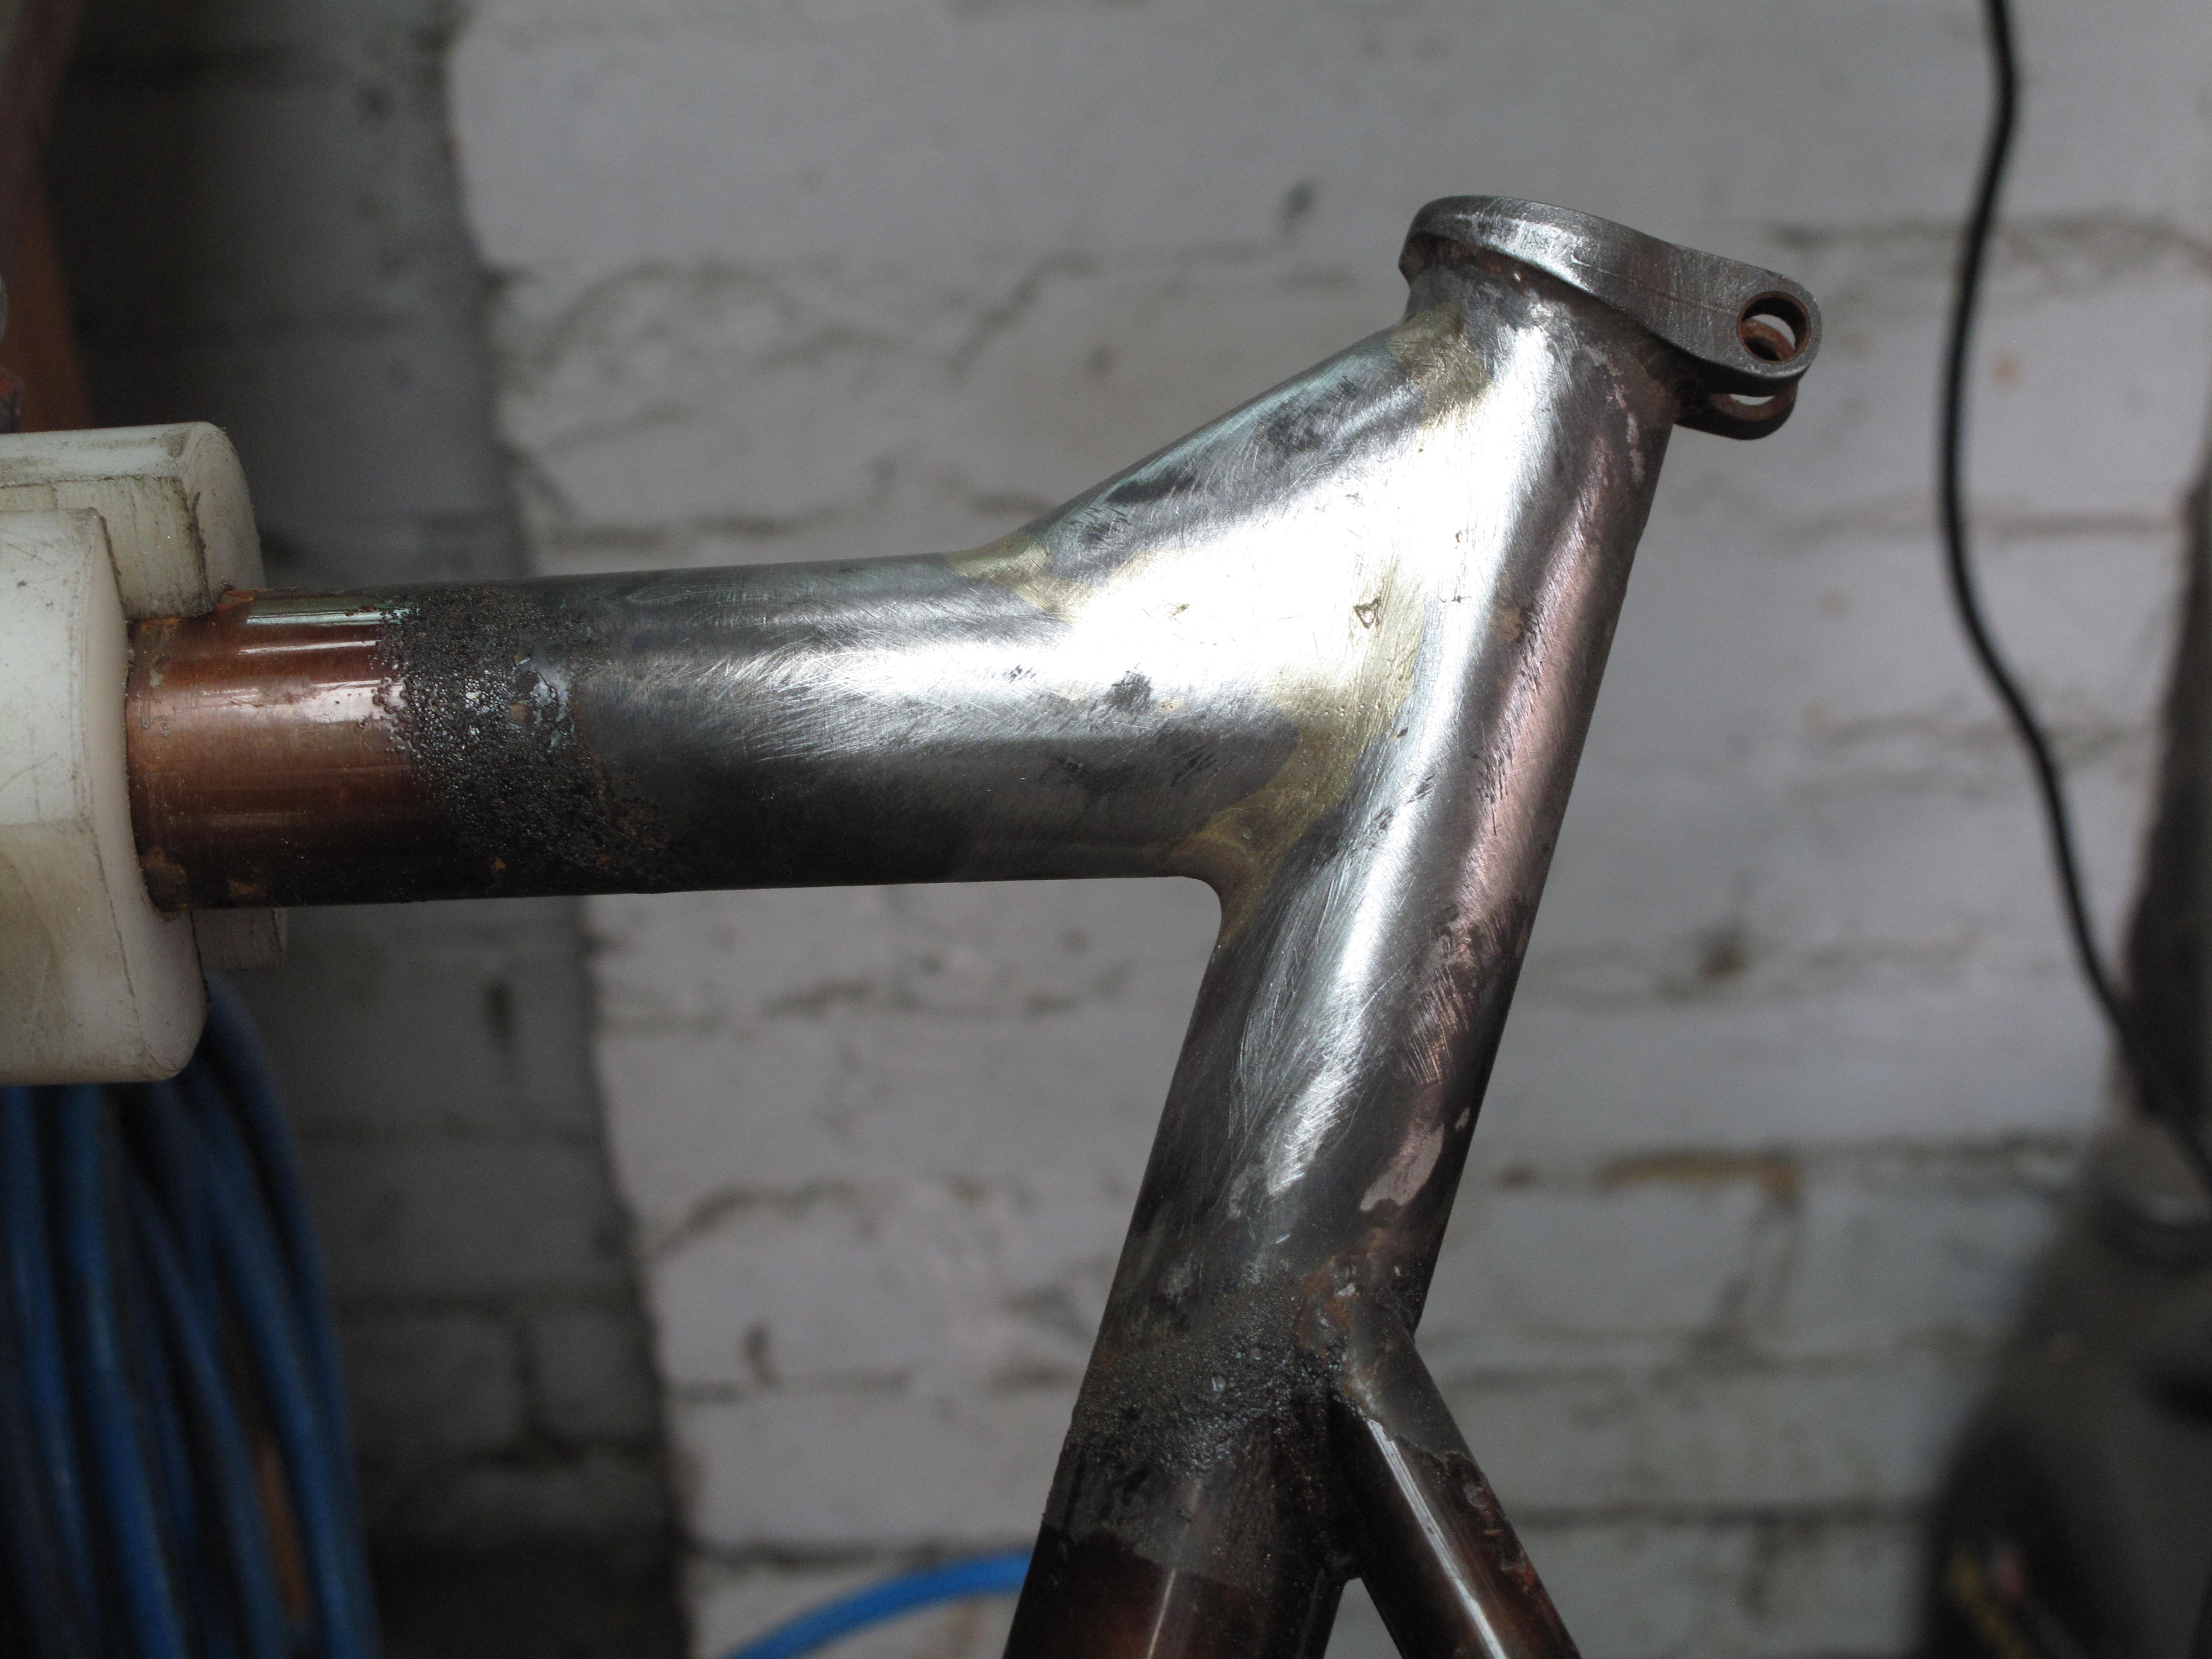
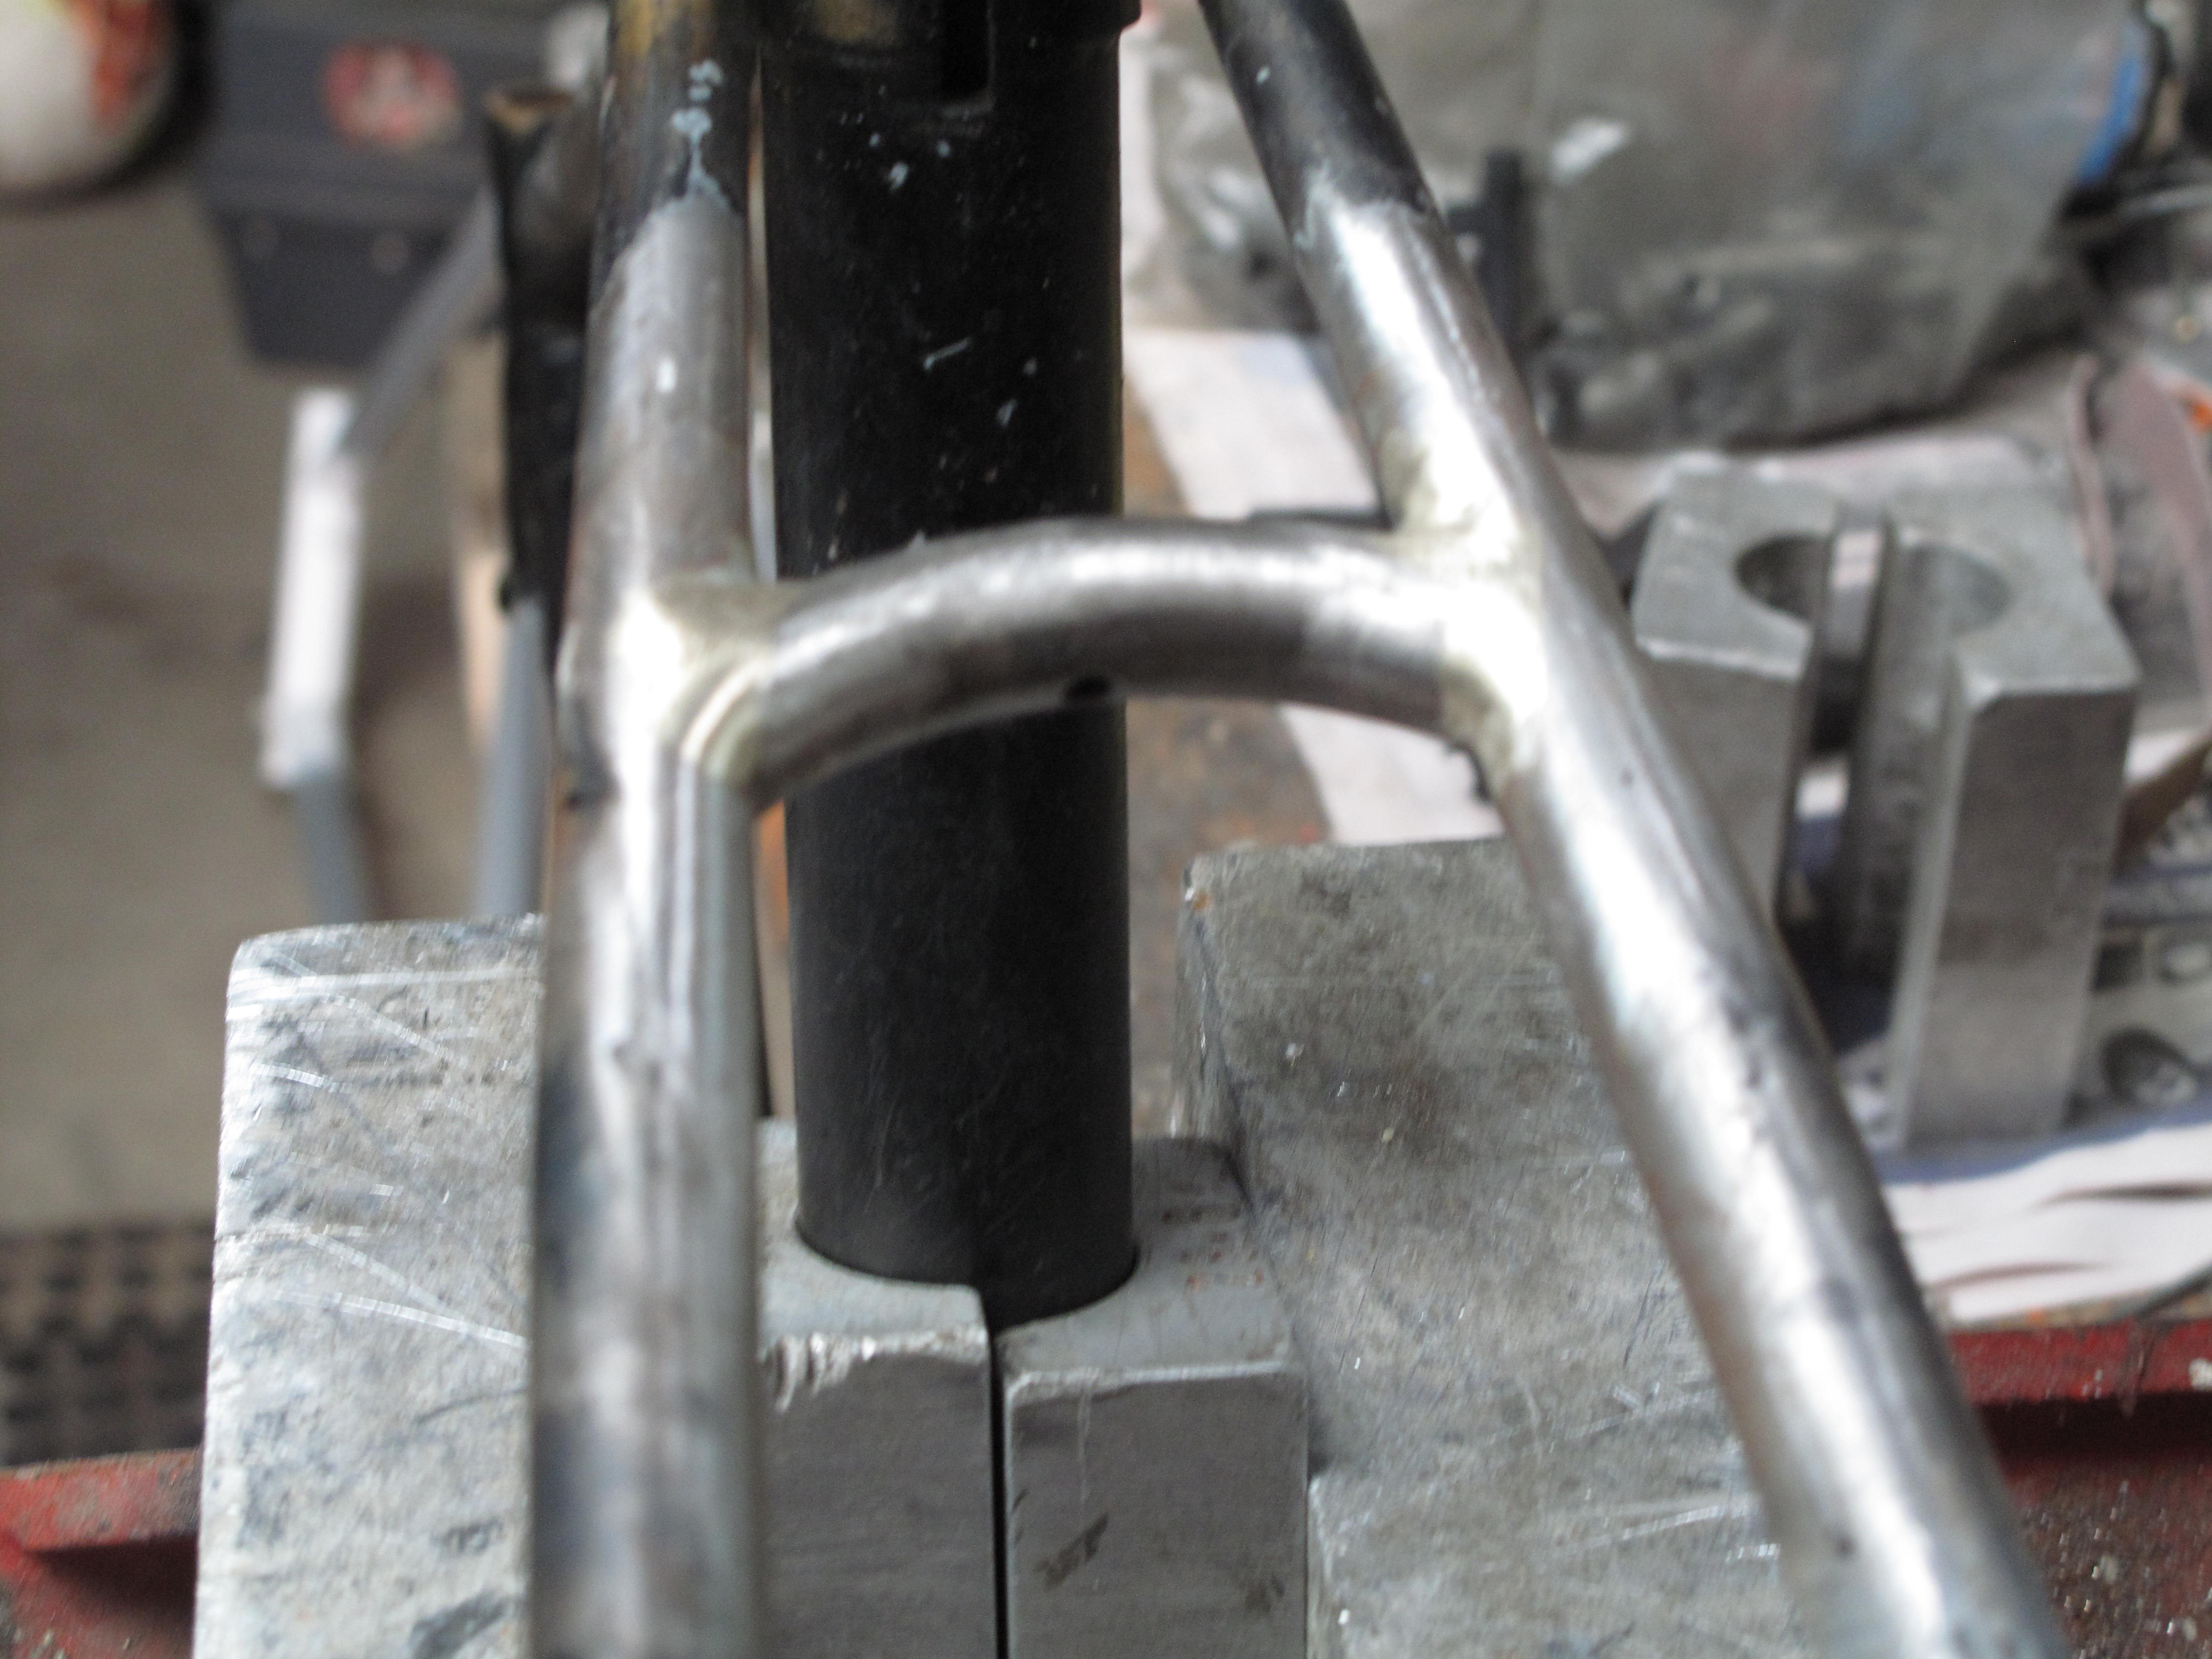
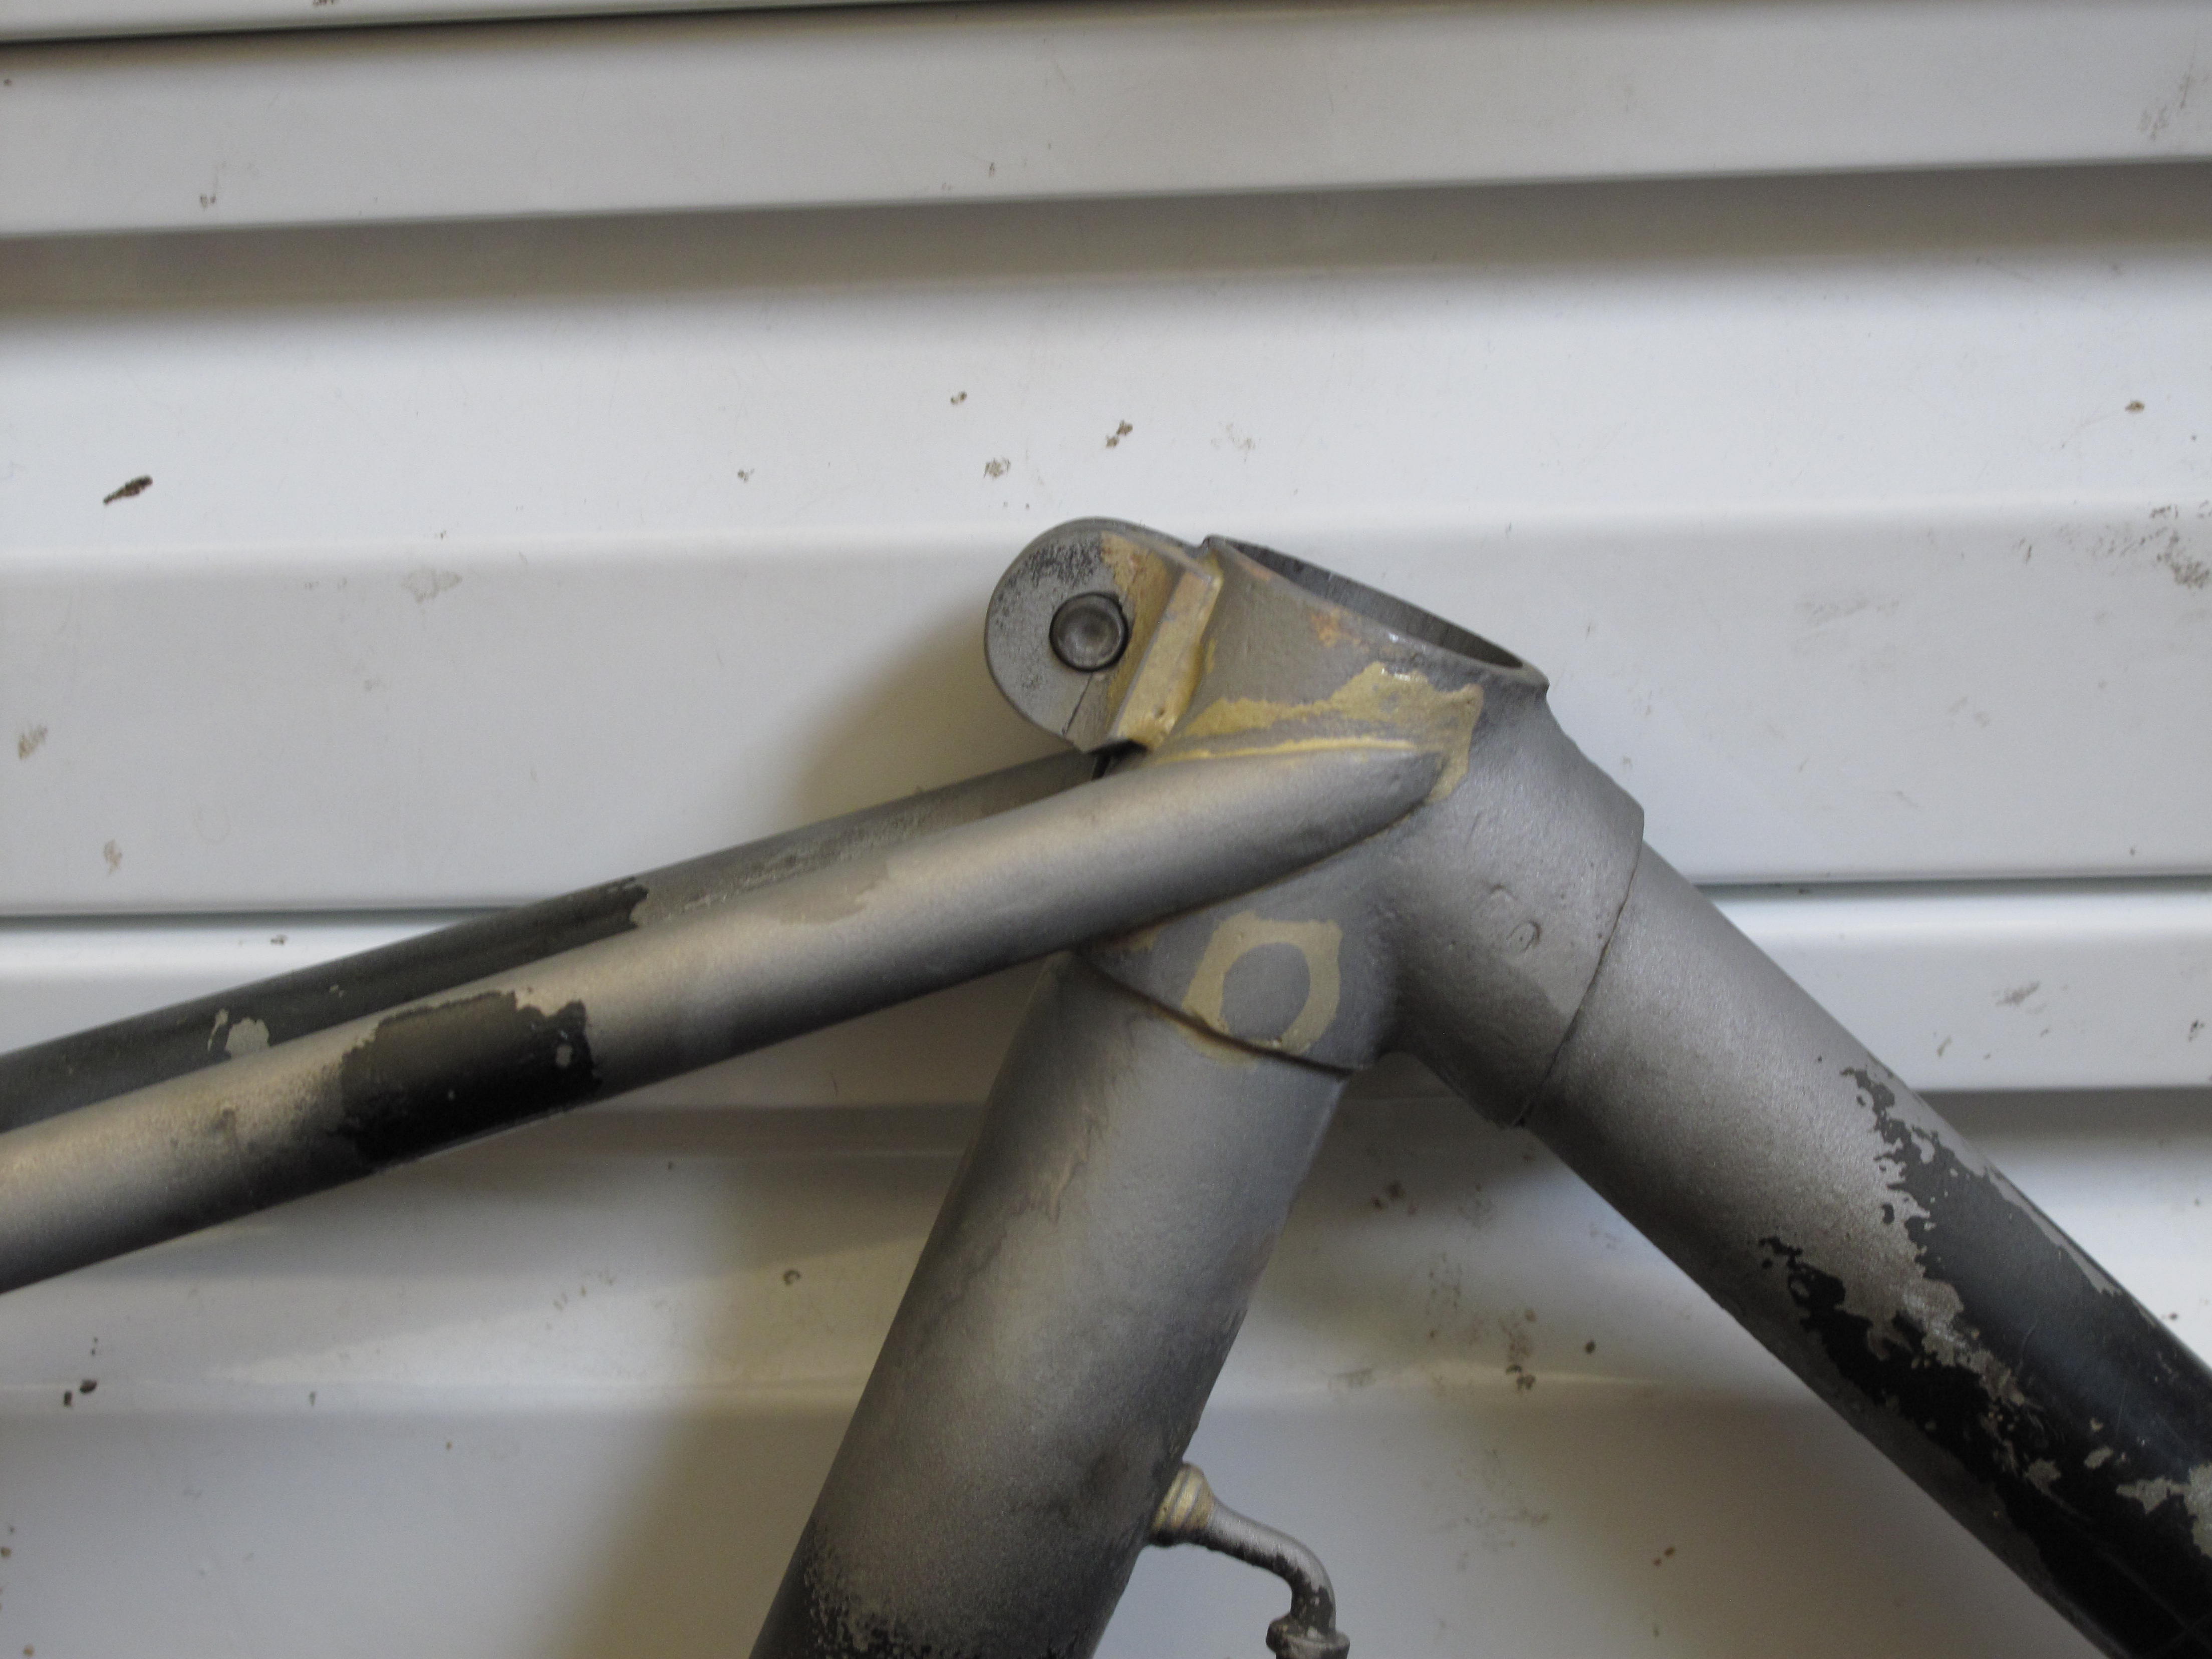
These bikes are pre- BSA standards and just post the high wheeler or penny farthing era. As such they have some very interesting features. Not the least is yet another example of the fact that there is nothing new under the sun. Observe the offset chain stays in an obsessive attempt to make sure chain line was correct.

Offset Chain stay

Offset Chain stay

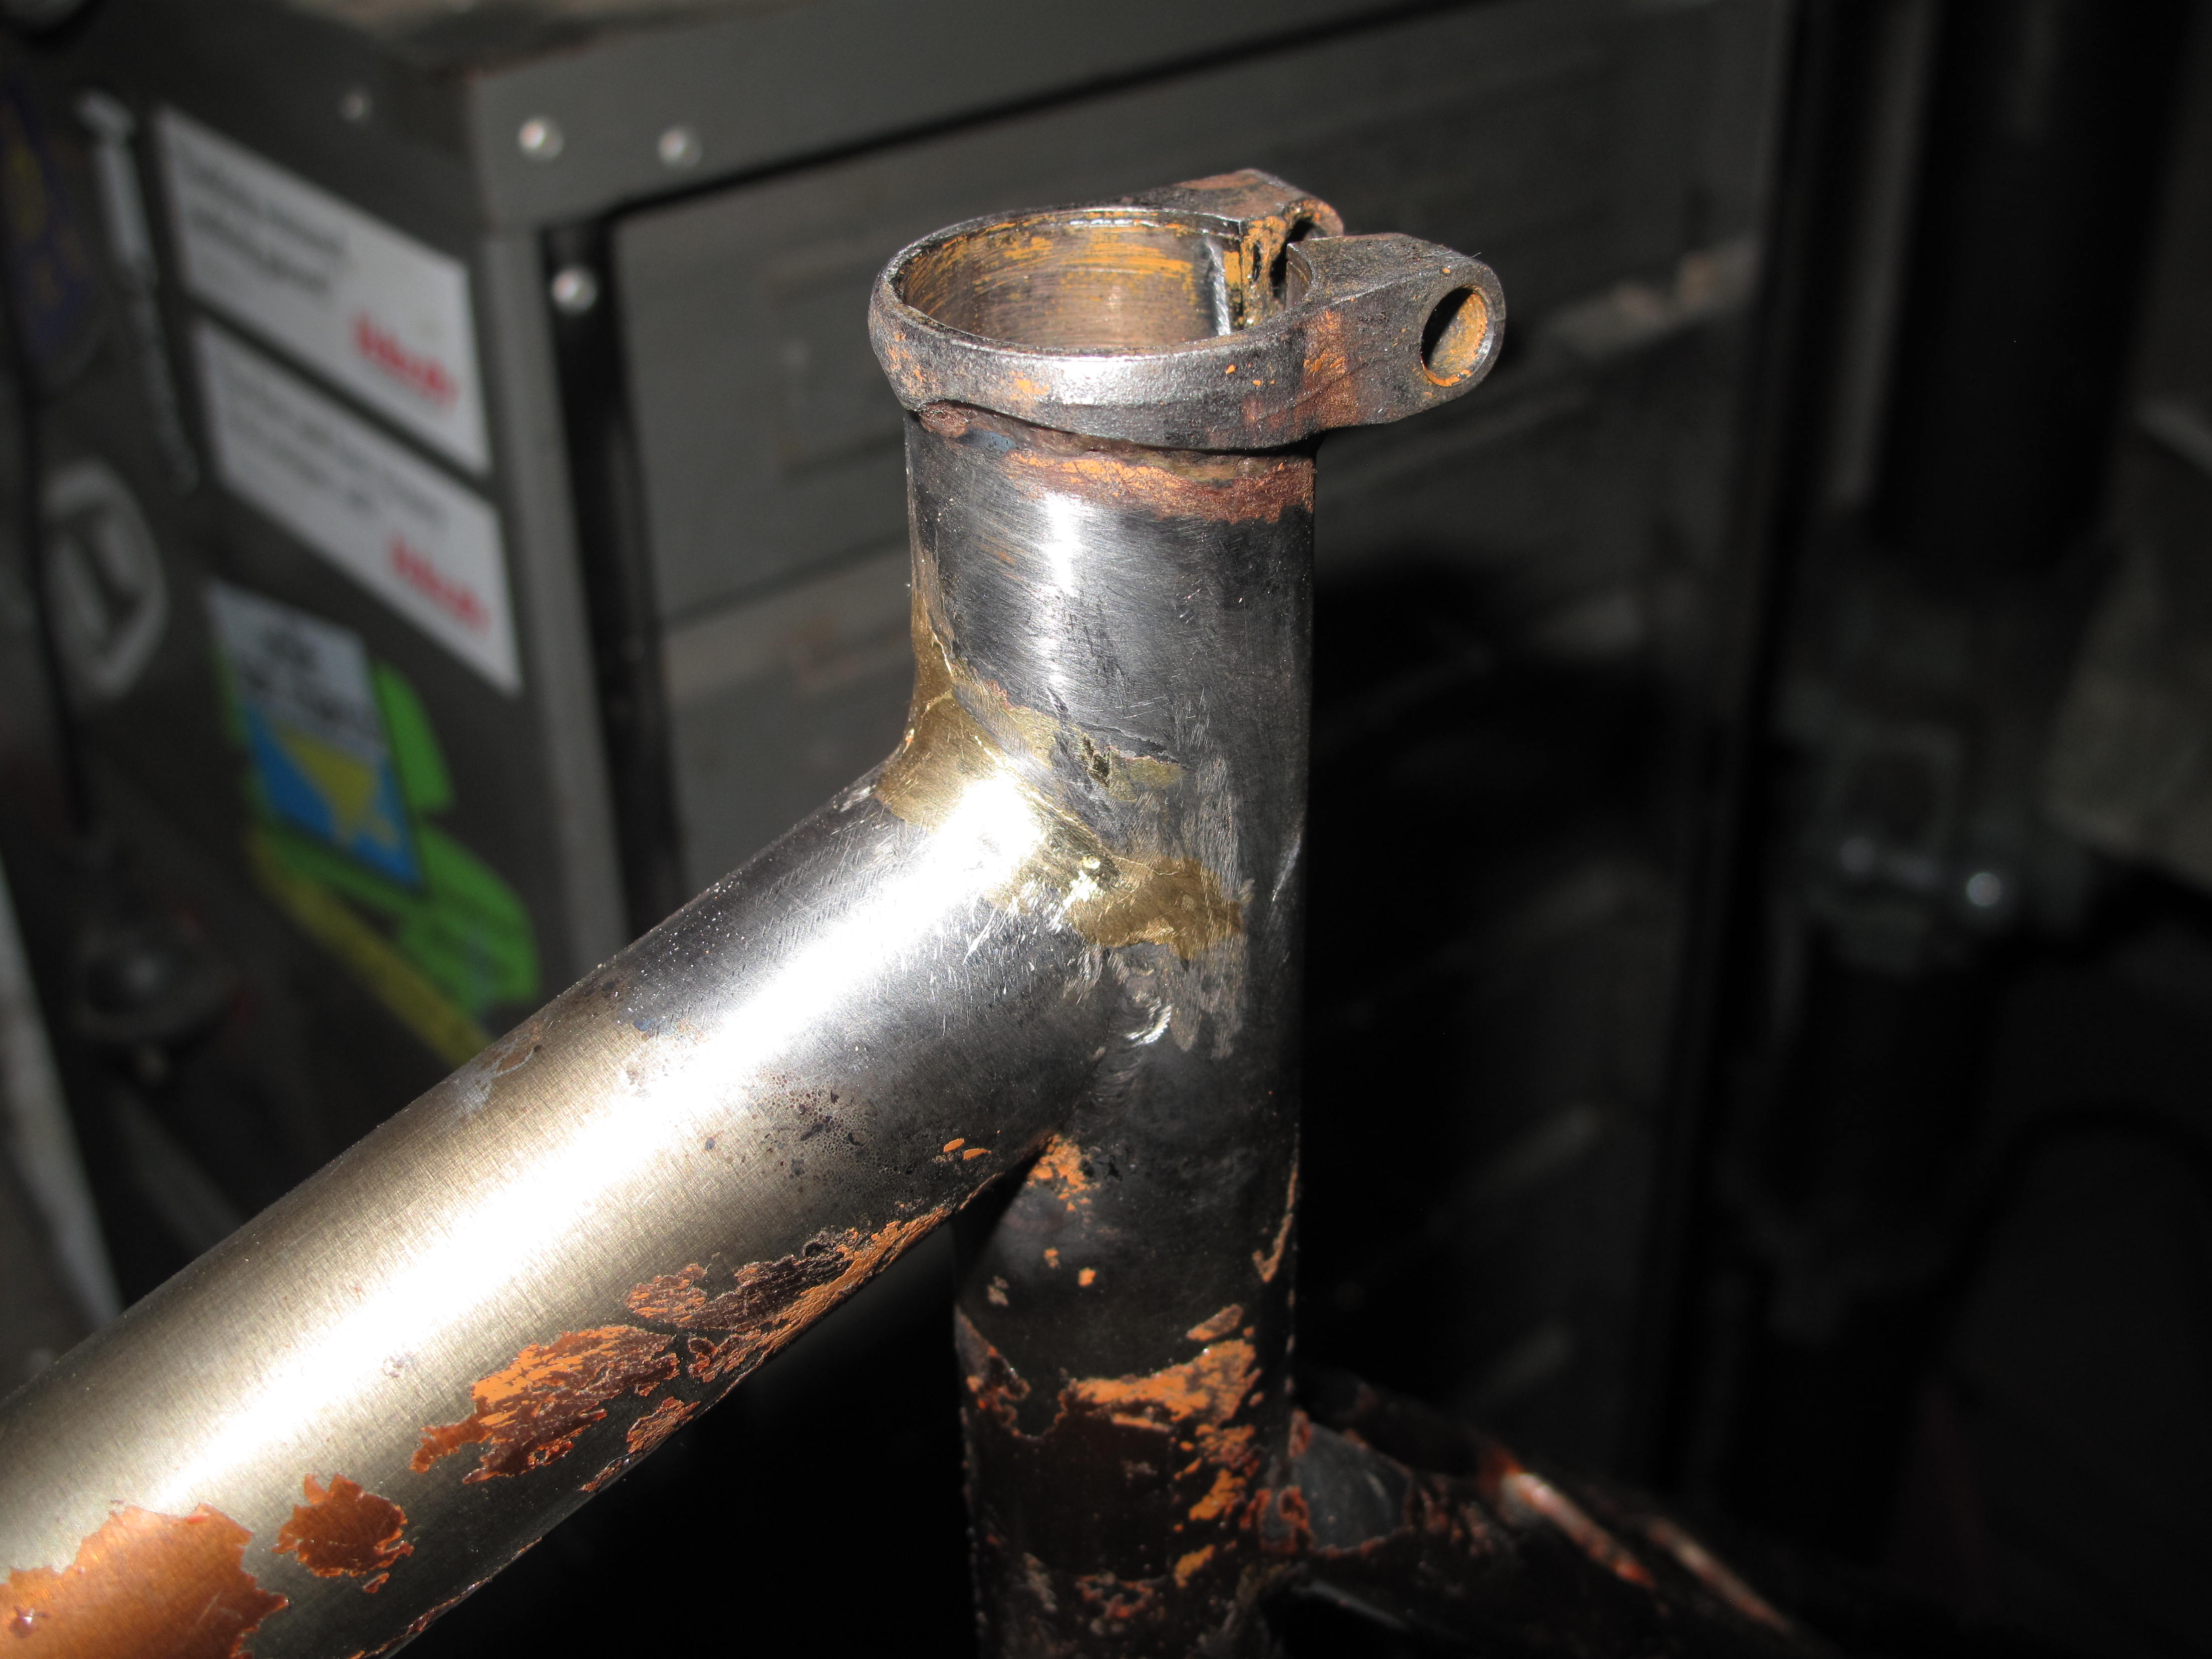
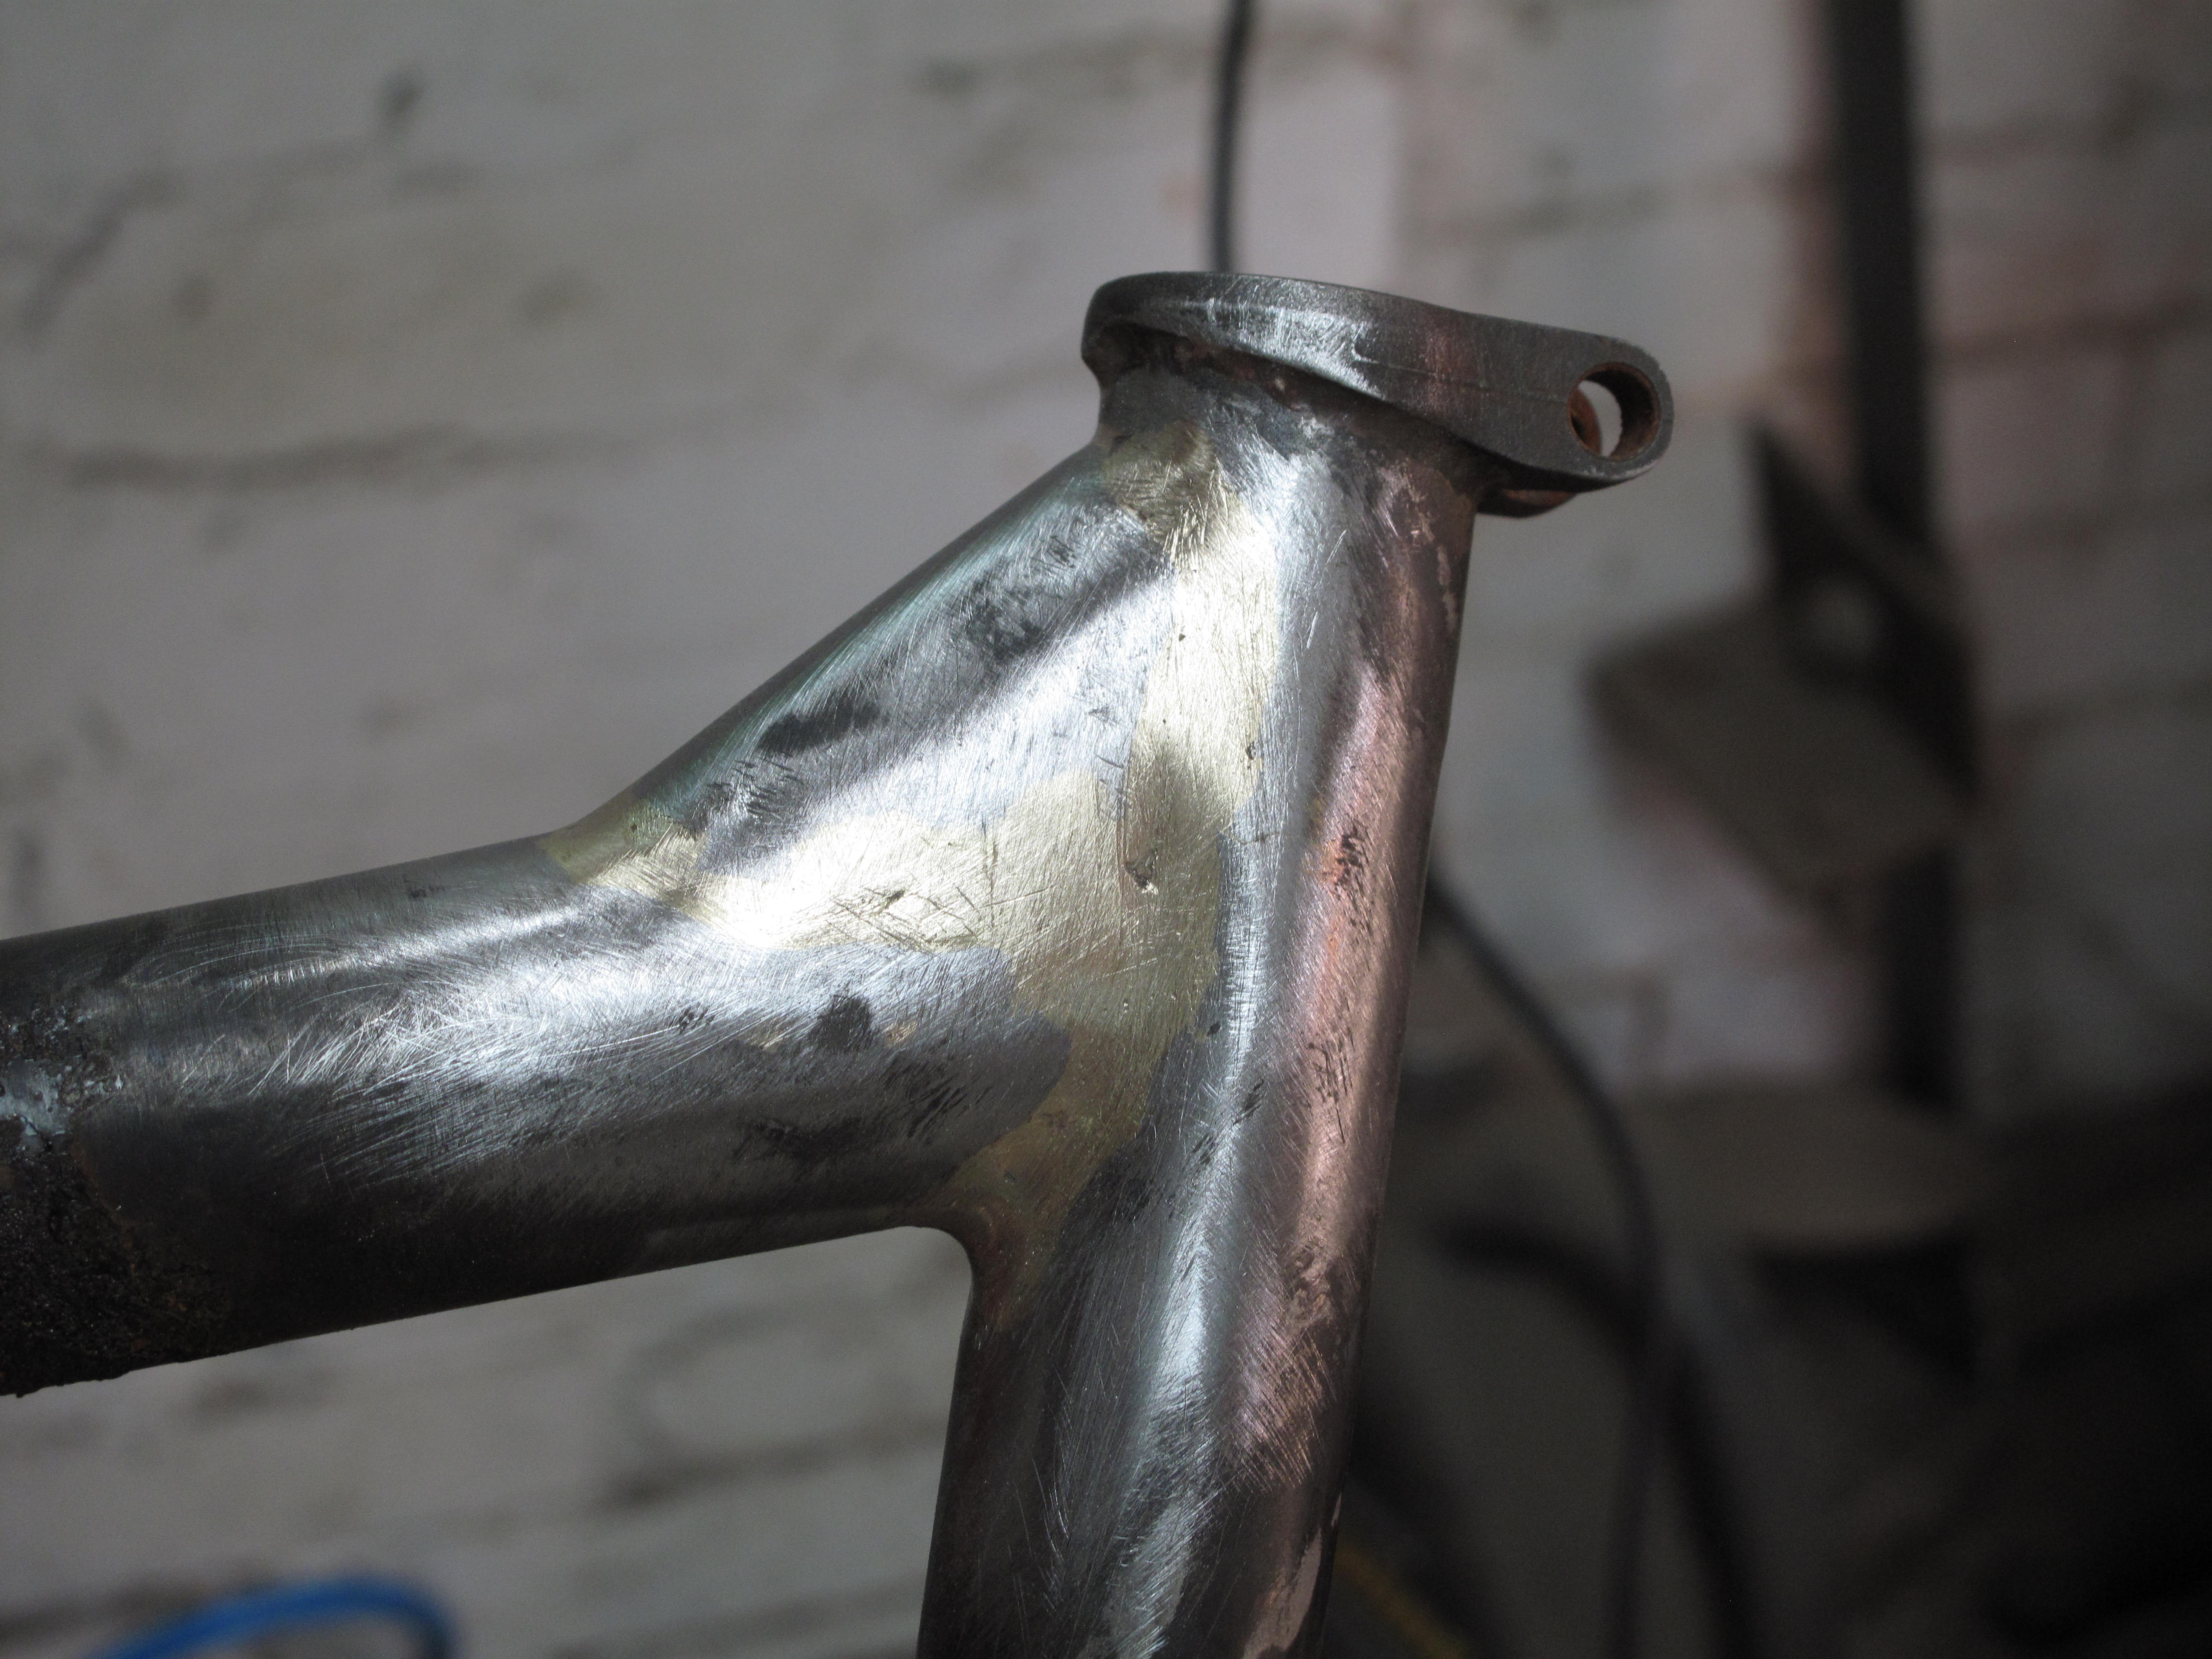
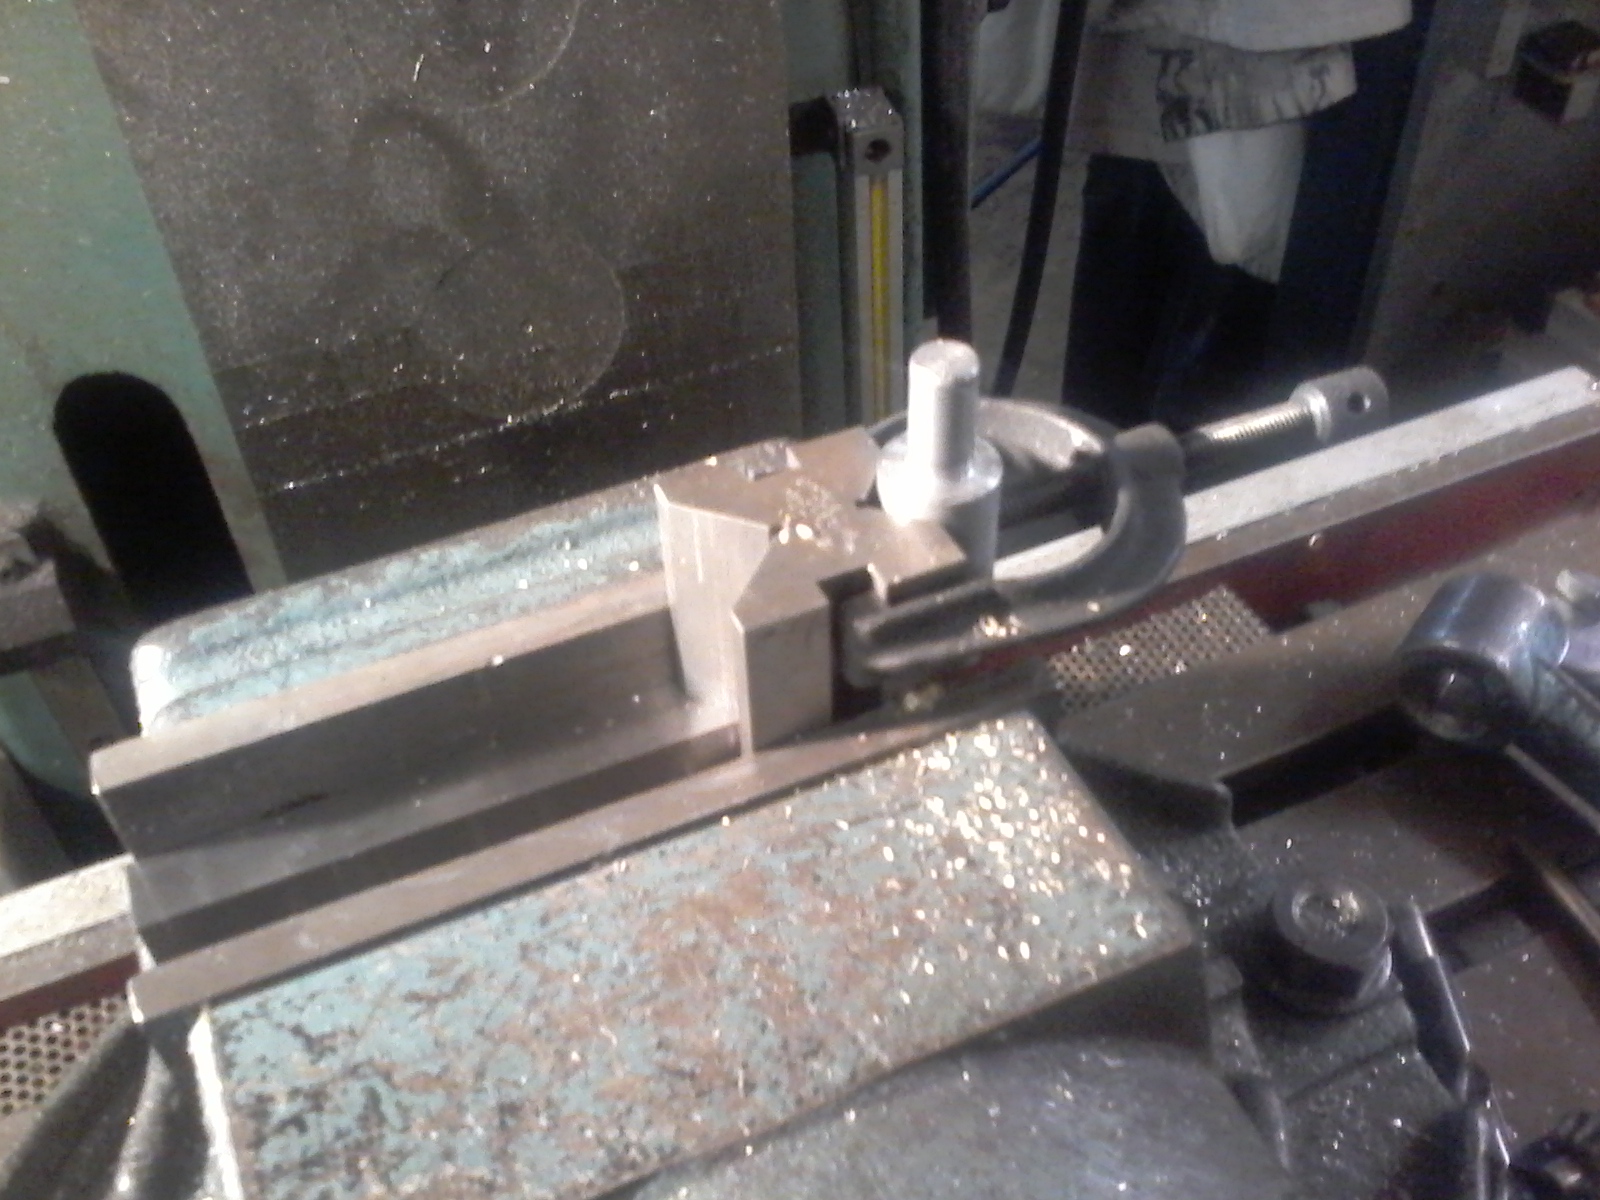
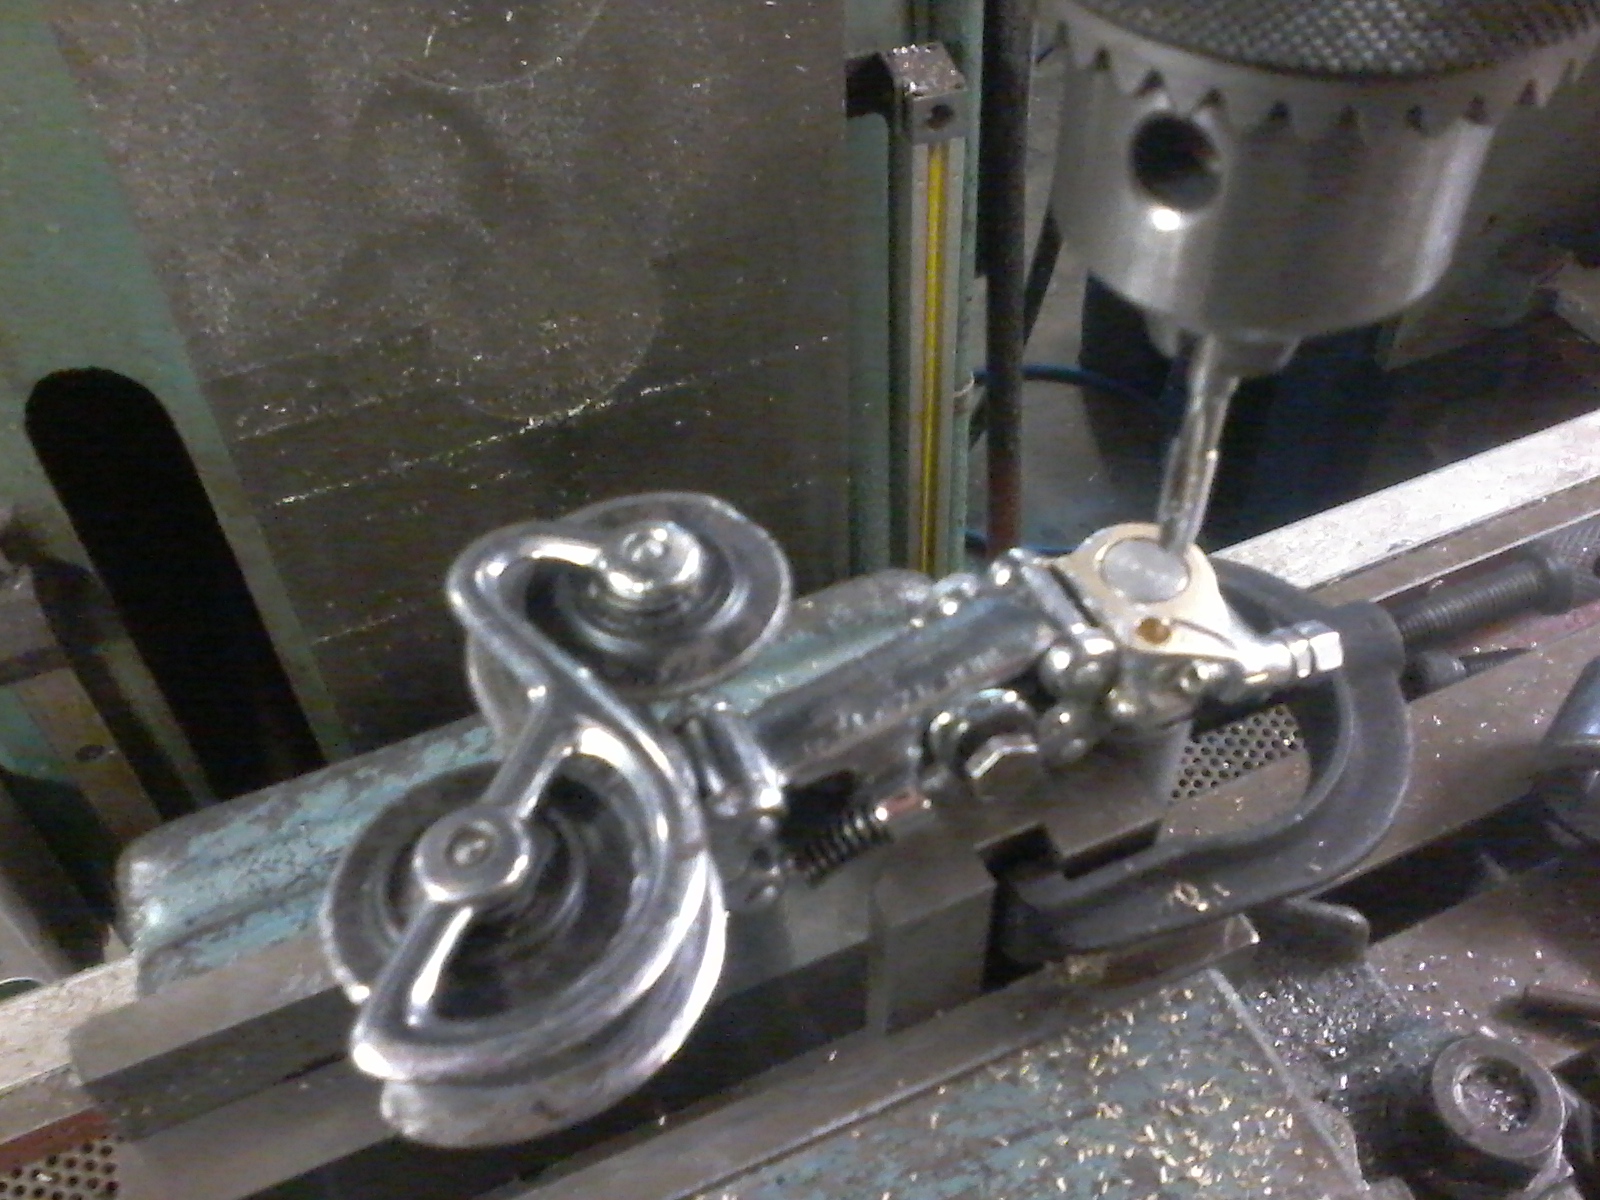
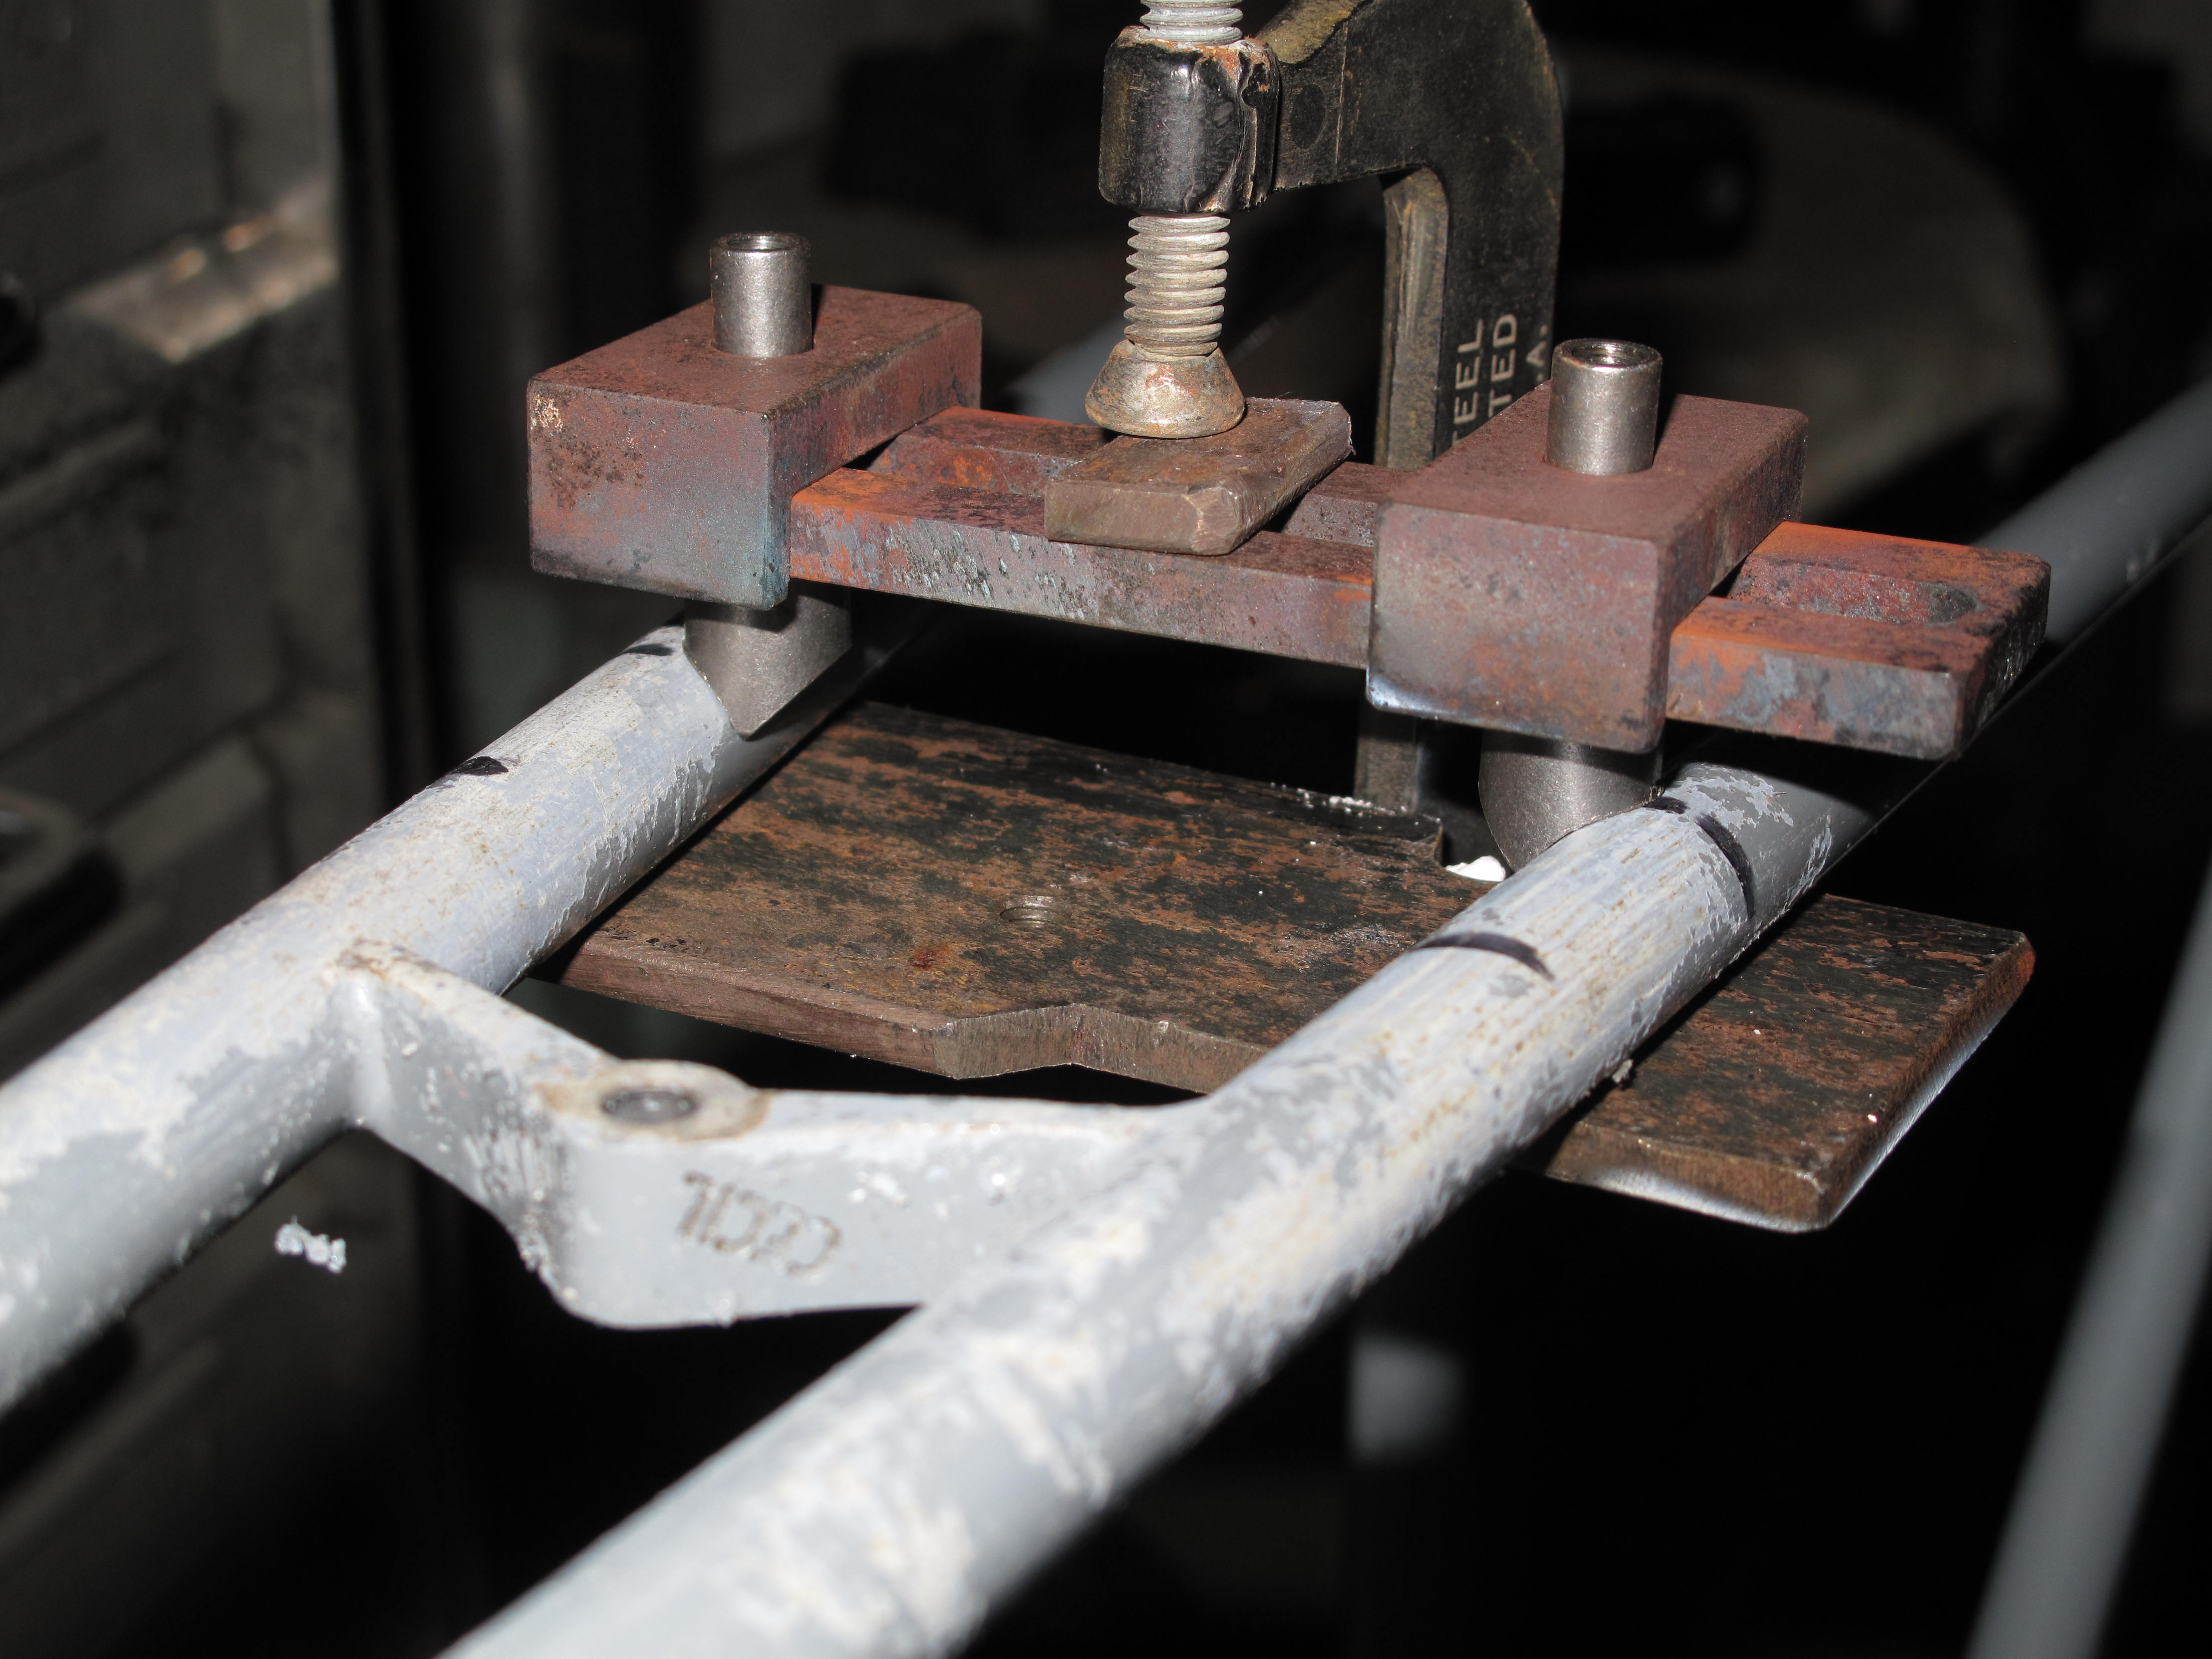
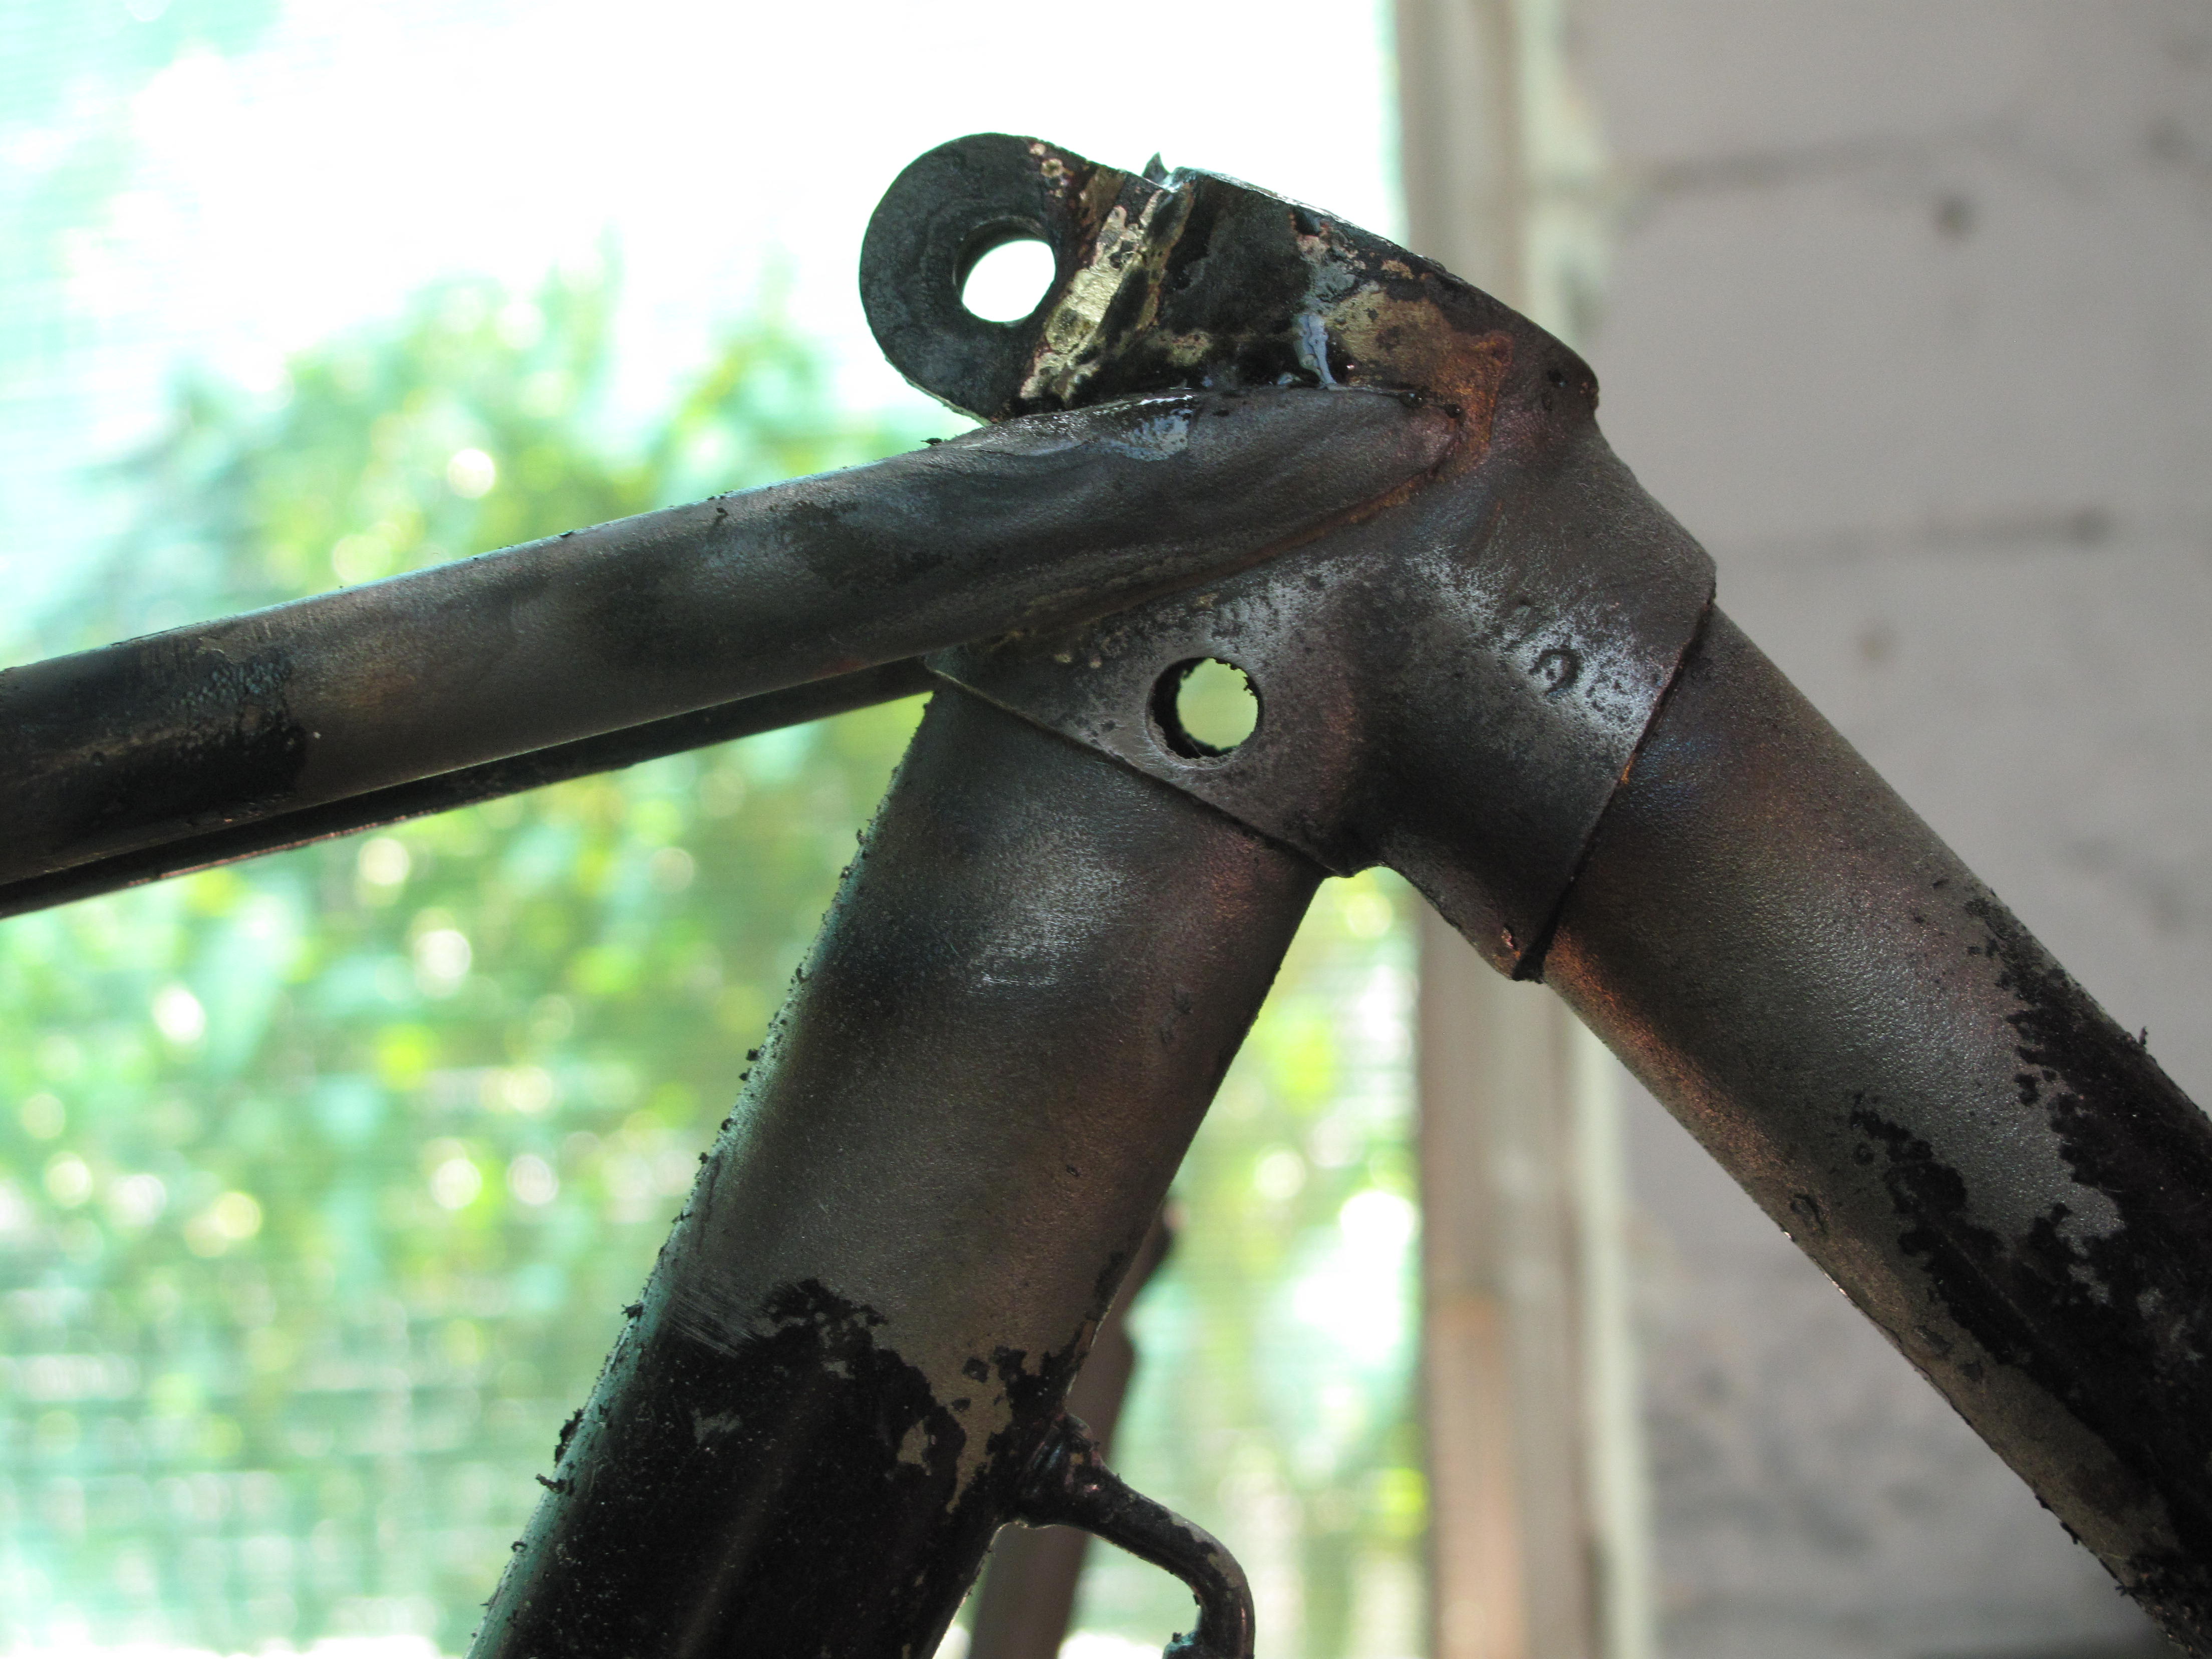
More recent bikes have featured asymmetrical chain stays for both the same reasons and in an attempt to provide more direct power transmission. Marks frame was out of alignment and because the bottom bracket was a smaller diameter than the standard ( now almost unlimitedly variable ) BB, I had to turn up some bushes in order to use my alignment post. In a past attempt at cold setting this frame the chain stay bridge had been torn away from the stays so a bit of brazing was required to repair that.

Humber Alignment

Humber Alignment

Humber alignment

Humber alignment

As it turned out the frame wasn’t that far out and when I had finished it was spot on, but the fact that these frames sit rather high may have exaggerated the feeling that Mark was having. Anyway he was happy and has gone off to re-assemble it and experience the ride of over a century ago

 
Leave a comment

Posted by on December 3, 2015 in Uncategorized


Steves Fat Chance

Its been a little long
Steve White from Whites Bikes https://www.facebook.com/Whites-Bikes-848027718592598/timeline/ called me up. During the 1990’s Steve was the Australian distributor for that iconic American company, Fat Chance. He had tracked down his own personal bike from the time and was in the process of restoring it. It had gained a few dents over the years and he wanted me to fill them before he sent it for paint. Apart from the fact that Steve is a friend it was cool to get to work on a bike with such history and be part of the process of getting it back on the road

Fat Chance Buck Shaver

Fat Chance Buck Shaver

Steve's Fat Chance

Steve’s Fat Chance

Buck Shaver Down Tube

Buck Shaver Down Tube

Buck Shaver Seat Tube

Buck Shaver Seat Tube

Fat Chance Buck Shaver Stays

Fat Chance Buck Shaver Stays

Nick turned up with a frame he had bought on a trip to The States. Not just any trip, his Honeymoon. Its a bit of an unknown quantity. We are wondering if it is the product of a beginner at a frame building school. While Nick really likes the bike it had developed a crack at the top of the seat tube. It presents as a tig welded frame and I could see where the inexperience of the welder had led to some serous undercutting in the weld. This would have weakened the frame leading to the crack. It is a very tall frame. When I took the paint off I discovered that someone had attempted to fill said crack with brass. After a discussion with Nick I agreed to lay a brass fillet right around the top tube / seat tube joint and fit a gusset on the top tube to strengthen up the junction. Nick comes from a mtb background so gussets are normal for him and I think this will extend the life of his frame substantially. Now he just has to decide on what colour to paint it

Nick's tall frame

Nick’s tall frame

Original repair

Original repair

Fillet and gusset

Fillet and gusset

Another shot of the gusset

Another shot of the gusset

 
Leave a comment

Posted by on October 12, 2015 in Uncategorized


Lessons from repairs

Doing repairs on frames can be both rewarding and insightful. The repair I talked about last month for Justin turned out to be just that. When I wrote about it I suggested it would be a minor repair on the seat tube along with the cantilever bosses. That repair was due to a small crack that had appeared around the top of the right hand seat stay. Justin had found grease from the seat tube being pumped out through this crack and wisely decided to get it looked at. As you can imagine it was very small, but nonetheless, would get bigger if we didn’t do something. It is was so small that it wouldn’t show up in photos. This frame is fillet brazed and while it has a collar at the top of the seat tube where the seat post is tightened up,it doesn’t extend down to the point of the junction of the seat stays with the seat tube.

Justin's Fillet Brazed seat tube

Justin’s Fillet Brazed seat tube

Therefore the stays are brazed directly to the side of the seat tube. Given seat tubes are single butted to accept a pillar the wall thickness here is rather thin. Time and use and the stresses applied in this area will eventually lead to the sort of failure we were beginning to see. While I don’t usually like the idea of patches and generally would rather replace a tube we decided that in this instance that is what I would do. The small plates you see below were cut out, bent and brazed to the seat tube covering the crack on the right side and shoring up the other side for the future.

Repair plates / Faux Lug

Repair plates / Faux Lug

Seat stay attachment repair

Seat stay attachment repair

Because these plates nestled around the stay tips there is effectively a fillet brazed aesthetic that also strengthens the attachment of stay to tube. Its also a bit of a Faux lug look from certain angles. There is always a question of how far you go with something like this and discussion with the customer is all important. In the end Justin was happy with our decision and it went off to the powder coater’s for color. I was reminded once again of what not to do when building a frame.

Color choice

Color choice

Justin's repair. Back from powder

Justin’s repair. Back from powder

Now for some Fat Chance fun

 
Leave a comment

Posted by on September 2, 2015 in Uncategorized


Vincent’s Gran Sport deralier repair

The last month has seen a variety of work in the workshop. I started out with a visit from Vincent and an odd request. Vincent had recently taken possession of his fathers racing bike and had it shipped out to Australia from Ireland. He had discovered that the Campagnolo Gran Sport rear deralier had a broken stop where it comes up against the hanger. You know that little knob that stops the thing pivoting all the way forward. Early Gran Sports are bronze with chrome plating. Vincent knew that he could buy another one but wanted to attempt a repair for obvious personal reasons. I agreed to try. I filed of what was left of the broken part and turned up a post to be able to hold the deralier square in the milling machine. I drilled and tapped a 6mm hole in the right spot and then turned down an 6mm cap screw so that it would just clear the hanger as it rotated. I cut off the cap screw to the right length. Viola

Gran Sport deralier

Gran Sport deralier

Gran Sport broken tab

Gran Sport broken tab

Gran Sport deralier post

Gran Sport deralier post

Gran Sport Repair

Gran Sport Repair

Then I had a return visit from my artist friend Bundit with another request for some single speed badness

Bundits Single Speed badness

Bundits Single Speed badness

Bundits new brake bridge

Bundits new brake bridge

Finally and not yet complete Justin dropped around his Cecil Walker to get a set of canti pivots brazed on to it and to do do a slight repair on the seat tube.

Justins canti pivots

Justins canti pivots

The setup for Justin's rear canti pivots

The setup for Justin’s rear canti pivots

I am always learning something. I had taken it for granted that all rear deralier pivot bolts were M10 x 1.0. Doing Vincent’s gran sport I discovered that early Campagnolo used 26tpi (threads per inch). Nearly but not quite the same

 
Leave a comment

Posted by on July 31, 2015 in Uncategorized


Jeff’s Michalo

First off, thanks to everyone who dropped by at MCBS on the weekend. I thought it was a really good day. Thanks Andy ( that’s Mr FYXO if you weren’t aware ).
Anyway, I think I may have mentioned after Christmas that I had returned from holidays with a Michalo frame in need of some tlc. Jeff had this frame built by Ron Mitten in 1987 ( according to the stamp in the BB shell ) but it had suffered through a number of salt laden winters in the coastal town of Port Fairy here in Victoria. Jeff had used it as a training bike in recent years and given the condition of the forks he asked me to have a look at it.

MIchalo before work

MIchalo before work

He had been running a 10spd rear hub in a rear end spaced for 7spd so he wanted to spread things out to make that work a little better as well. I discovered that there was a crack in one of the chainstays and decided that the best thing to do was build a new fork for the front. I sent the frame off to have the chrome stripped off so that I could replace that stay and measured up the old fork to replicate it.
Unfortunately, and Jeff knew the likelihood of this when he handed it over I had to cut the stem off to get it out. Another casualty of the environment.

Michalo chainstay crack

Michalo chainstay crack

Anyway a month later it came back from the chromers and I replaced the chainstay, reset the rear end and in the meantime had built a new fork. Jeff had wanted to maintain a threaded fork and I ordered a nice new Chris King 2 nut threaded headset. I then sent it off to Kevin Wigham for paint along with a set of decals made up by Greg Softley. It came back about 10 days prior to MCBS and I would have loved to show it there but Jeff was in Melbourne for personal reasons and we agreed that picking it up then was the best thing for everyone. This job took a long time from start to finish. Most of that time was time spent away from my shop and in the shops of others, but I hope you agree the finished result is really nice

Michalo Chainstay crack after chrome was removed

Michalo Chainstay crack after chrome was removed

Michalo with the chainstay removed

Michalo with the chainstay removed

Michalo, decals and Chris King headset

Michalo, decals and Chris King headset

Michalo, refreshed and ready to go

Michalo, refreshed and ready to go

 
Leave a comment

Posted by on June 29, 2015 in Uncategorized


MCBS

Heading to the Melburn Custom Bike Show tomorrow. http://fyxo.co/melburn-custom-bicycle-show/ Stall 7 See you there

 
Leave a comment

Posted by on June 26, 2015 in Uncategorized


Vincent Long’s, A Passionate Man

A couple of summers ago I had a chance meeting with a guy named Vincent Long at the local pool. We got to talking bikes since we had both pedaled to the pool. It turned out that Vincent is a photographer / filmmaker  http://www.vincentlong.com  and expressed an interest in doing a piece on me and my work. Over a number of weekends he visited me in the workshop. We chatted,he filmed and came up with this. Vincent has since moved to live in Mexico but has kindly persisted with this project. I hope you like it


Leave a comment

Posted by on May 29, 2015 in Uncategorized


Tags: , ,

A stuck seatpost and a fillet braze repair

I know its been a while.Thankfully that home reno is nearly finished and I have been spending time with a paint roller in my hand rather than posting online

Old friend Steve White from recently opened Whites Bikes in North Fitzroy (go check it out) rang me with a job. He had a customer with a stuck seatpost. When he had started work on the bike Steve had noticed a crack starting to propagate around the fillet at the seatpoast / top tube junction. Could I fix it ? Sure I said. Given that I was going to be applying some heat to the seat tube to fix the crack the stuck post had to come first. When it refused to move after a couple of days worth of penetrene I cut it off. When I poked a tape measure down inside the post I discovered there was 200mm of post inside the tube. Who does that? I set it up on the mill and drilled most of it out diameter wise. I then made an extension for my adjustable reamer and reamed it out to the 27.2 diameter that it needed. After that I filled back the fillet and set about rebuilding it to repair the frame

Fillet Brazed repair

Fillet Brazed repair

Reamer Extension

Reamer Extension

Drilling out a seatpost

Drilling out a seatpost

 
Leave a comment

Posted by on May 19, 2015 in Uncategorized


The things some people do

Matt brought me this frame of unknown origon. I would say roughly circa 1950, maybe 1960.

Matt's circa 1960's frame

Matt’s circa 1960’s frame

At some time somebody had managed to snap one of the seat lug ears off. I can only imagine that the cause of this is because they had used a seat post that was too small and had simply continued to tighten the binder bolt past the point of no return. Anyway, their method of repair was to drill a hole straight through the frame (and presumably the seat post) so that they could then put a bolt right through the lot and prevent the post from slipping down.

The repair you shouldnt do

The repair you shouldnt do

This rendered the frame somewhat useless for anyone of a different height, letalone the asthetic damage done to it. I ground off the remains of the binder and fashioned a new one that was then brass brazed on the the lug beside the original. I turned up a couple of plugs and silver soldered them into the holes.

Plug and new seatlug ear

Plug and new seatlug ear

I filed them down and reamed the seattube once they cooled. A coat of paint and it will be good as new

Finished and in need of paint

Finished and in need of paint

 
Leave a comment

Posted by on March 31, 2015 in Uncategorized


Cadel Evans Peoples Ride

At the Cadel Evans peoples ride

At the Cadel Evans peoples ride

Cadel Evans peoples ride

Cadel Evans peoples ride

I said in a previous post I was looking forward to this ride and I wasnt disappointed. I had spent a week earlier in January down in Port Fairy riding, swimming and  enjoying the company of the local riders. I fronted up in Geelong  to participate in the Cadel Evans ride, found my speed group and elbowed my way into the crowd. I looked up and who should be standing next to me amongst the sea of green jerseys but two of my Port Fairy riding friends. We rode the course together and finished in what I thought was a respectable 3hours and 58minutes. I know without them I would have been considerably slower. We got back in time to see the women’s race take off and I hung around drinking coffee with the guys and waited to see the winner of that race come home. I must say as I was watching the men race on the television the following day from the comfort of my lounge room I was glad we didn’t have to ride when the weather turned bad. However I was very glad I made the effort and will plan to be back at this event next year. It may seem from my recent posts that I am spending more time riding than building. Not really true. My visit down the coast had me come home with a frame for repair. I will post about this soon

 
Leave a comment

Posted by on February 18, 2015 in Uncategorized